Turkey Enchiladas
We like to have turkey throughout the year, not just at the holidays. When we have left-over turkey, as we always do, one of our favorite recipes is Turkey Enchiladas. You can also make these with chicken.
Here's how I put mine together:
2 cups diced turkey (approximately 2 cups - you can do more or less)
1 can cream of ____ soup. I use anything without MSG, like cream of broccoli, cream of mushroom or cream of chicken. All of these are good in this recipe.
1/2 to 1 cup sour cream
1/4 to 1/3 cup milk
1 cup plus extra of shredded cheese. We like the Sargento 4 flavor Mexican blend8-10 flour tortillas. If you use packaged and they are smaller, you'll need about 10.
Salt and pepper and other seasonings to taste - I change this based on how I seasoned my turkey meat during baking. If you are using chicken, I boil the chicken with onions and garlic for extra seasoning.
Dice your turkey so you have about 2 cups and place into a medium-sized mixing bowl.
In a separate bowl mix the cream of soup, sour cream, milk and 1 cup of shredded cheese. You want a fairly thick mixture.
Place 1/2 of the soup mixture in with the turkey and stir well. Spoon this mixture into the individual tortilla shells and roll them up. Place them in a lightly greased 9x13 inch baking pan.
When you have all of the turkey mixture in the tortillas and they are all in the baking pan, you'll spoon the remaining soup mixture over the top of the tortillas and sprinkle with extra cheese.
For baking, if your turkey was cold when you started, you'll want to make sure it gets heated through. So I bake mine on the Convection setting of my oven at about 400 degrees for 15-20 minutes or until the cheese is very golden and I'm sure the middle of the tortillas is warm.
If you are doing this with chicken and have just finished boiling your chicken and have cut it up and it is still warm, you can bake it in a regular oven at 350 degrees for about 20-30 minutes or until the cheese is very golden.
Spicy Oatmeal Cookies
Spicy Oatmeal Cookies (not spicy as in hot, but containing spices)
1/2 cup shortening or butter
1-1/2 cups sugar
1/2 cup molasses
2 eggs
1-3/4 cups all-purpose flour
1 teaspoon salt
1 teaspoon baking soda
1 teaspoon cinnamon (I always add more than this!)
2 cups quick cook oats
1-1/2 cups raisins
3/4 cup chopped nuts
Cream shortening, sugar and molasses. Add eggs one at a time and incorporate. Sift dry ingredients into a separate bowl, then stir into wet mixture. Add oatmeal, nuts and raisins. Drop by small teaspoonfuls onto a greased cookie sheet. Bake at 350 degrees for 8-10 minutes. This recipe makes a chewy or crispy cookie, depending on the length of time that you bake them.
These are some of the best oatmeal cookies I've ever had. I love them chewy, so that's how we bake them. This recipe came to me from my dear friend, Mary.
Cranberry Relish #2

Real Fruit Fruitcake!
Yes, this is the real thing, nothing at all artificial, red, green or gold in this one! DELICIOUS!
Ready for the adventure? Here it is:
2 cups raisins
2 cups currants
2 cups dried apricot halves
2 cups dried fig halves
1 cup pitted prunes
1 cup pitted dates
4 cups walnuts - large pieces
2 cups pecans - large pieces
3 oranges, grated - zest only
3 lemons, grated - zest only
1/2 cup candied ginger - chopped
2 teaspoons cinnamon
1 teaspoon ground allspice
1 teaspoon mace
1/2 teaspoon cloves
1 cup molasses
2 cups brandy or apple juice
1/2 cup orange liqueur or orange juice
4 cups all purpose flour
1 Tablespoon baking powder
1 teaspoon baking soda
1 1/2 teaspoons salt
1 pound butter (yes, the real thing)
3 cups brown sugar
8 eggs
1 Tablespoon vanilla (yes, the real thing)
The day before, combine all dried fruits, nuts and zest in a very large mixing bowl. Add the candied ginger and spices. Toss well to mix. Add the molasses and liquids and mix well. Oh yes, the scent will be heavenly! Cover and let stand overnight at room temperature.
When ready to bake, preheat oven to 275 degrees F. Grease (4) 9x5x3 loaf pans, then flour. Sprinkle 1 cup of flour over the fruit mixture and stir it in. Combine remaining 3 cups of flour with baking powder, baking soda and salt. Sift if needed. Cream the butter until light and fluffy. Add the brown sugar and beat well. Add the eggs, 2 at a time, beating well after each addition. Add the vanilla. Add all dry ingredients and beat until batter is blended and smooth.
Pour this over the fruit, mix well until everything is coated with the batter. Divide the batter among the loaf pans filling them to 1/2 inch below the top of the pan. Bake for 2 hours. Don't worry if they crack on top. Cakes are done when a toothpick inserted in the center comes out clean.
Added bonus: we sometimes make these the day after Thanksgiving and tenderly add a few teaspoons every few days of grand marnier or orange liqueur before we serve them or give them as gifts.
Pumpkin Crisp

Pumpkin Crisp
2 - 15 ounce cans of pumpkin puree (not pumpkin pie mix)
1 large can of evaporated milk
3 eggs
1 cup of sugar
1 teaspoon cinnamon
1 box yellow or white cake mix
2 sticks butter (melted)
1 cup chopped pecans or walnuts
Mix the pumpkin, milk, eggs, sugar and cinnamon in a large bowl. Pour into a greased 9 x 13 inch pan. Sprinkle the dry cake mix evenly over the top. Sprinkle the chopped nuts evenly over the cake mix. Spoon the melted butter over the nuts.
Bake at 350 degrees for 50-60 minutes. Check at 45 minutes to make sure the nuts are not getting too brown. If they are, cover the pan with aluminum foil and continue baking.
Crisp is done when a knife inserted in the middle comes out clean. Delicious served with vanilla ice cream or whipped cream.
You can also make this in 2 separate 8 x 8 or 9 x 9 pans and share one!
Cranberry Relish #1
Here is one version of Cranberry Relish that we like with our Thanksgiving or Christmas meal.
Cranberry Relish (#1)
1 pound fresh, raw cranberries
2 large firm apples
1 whole navel orange
1 medium can crushed pineapple, drained
1 cup sugar
1 cup chopped pecans or walnuts.
Place cranberries, apples and orange into food processor or Vitamix and lightly chop. Add pineapple, sugar and nuts. Mix well and refrigerate overnight before serving. This will keep for several days in the refrigerator and gets better with age. It is also good on toast for breakfast!
Southern Sweet Potato Surprise
Here's one that I tried in 1997 for our Thanksgiving meal - I've made it every year since. It puts a nice, fresh spin on the standard sweet potato casserole!
Sweet Potato Surprise
1- 15.5 ounce can sweet potatoes - drained and cut in half
1 1/4 cups brown sugar, packed
1 1/2 Tablespoons corn starch
1/4 teaspoon salt
1/2 teaspoon cinnamon
1 teaspoon orange zest
1-16 ounce can apricot halves, drained - reserve 1 cup of juice (you can use dried apricots and re-hydrate them by using orange juice)
2 Tablespoons butter
1/2 cup pecan halves and/or raisins
Marshmallows for topping if desired
Place sweet potatoes in a greased 9 x 13 baking dish. Combine sugar, corn starch, salt, cinnamon and orange zest in a saucepan. Stir in apricot juice and cook over medium heat until boiling. Add apricots, butter and nuts/raisins. Pour mixture over sweet potatoes and bake uncovered at 375 degrees for 25 minutes.
If desired, add marshmallows for topping and brown until lightly melted.
Lemon Squares
Once in awhile I have a craving for something other than chocolate. Not often, mind you, but on occasion! Here's one that the whole family enjoys. I like this particular recipe, because the tartness of the lemon seems just right to me.
Lemon Squares
1 cup all purpose flour
1/2 cup butter, softened
1/4 cup powdered sugar
2 eggs
1 cup sugar
2 Tablespoons flour
1/2 teaspoon baking powder
1/4 teaspoon salt (optional - I omit this if using salted butter)
2 Tablespoons fresh lemon juice
2 teaspoons grated lemon peel or lemon zest
Heat oven to 350 degrees Fahrenheit. Mix together 1 cup flour, butter and powdered sugar. Press into an ungreased 8 x 8 or 9 x 9 square pan, building up the sides about 1/2 inch. Bake for 20 minutes - the crust should be light brown when done.
While the crust is baking, beat the remaining ingredients together until light and fluffy. Pour over crust while it is still hot. Bake for 25-30 minutes, until no indentation remains when lightly touched in the center. Cool, sprinkle with powdered sugar and cut into squares.
Yum!
Chocolate Oatmeal Cookies
Okay, these are so easy and the recipe has been around so long that I'm sure most of you probably already have it! These are a favorite for my girls and are quick and easy to make when you are short on time!
Chocolate Oatmeal Cookies
2 cups granulated sugar
1/2 cup milk
1/4 cup butter
1/2 cup peanut butter
1/4 cup cocoa
1 teaspoon vanilla
3 cups quick cook oats
In a large glass bowl, microwave the sugar, milk and butter for 3-5 minutes or until the sugar is dissolved. Remove carefully from microwave and quickly add the peanut butter, cocoa and vanilla. Stir until well blended. Stir in the oats and drop by Tablespoon fulls onto waxed paper. Allow to set until firm.
Easy as pie and you can't eat just one!
Peanut Butter Balls
This is a family favorite from my childhood. I can remember my mom making these when I was growing up - I love to make these during the holidays to include in any gifts from my kitchen.
Peanut Butter Balls
1 pound powdered sugar
1 cup shredded coconut
1 cup chopped pecans
1 cup graham cracker crumbs
1 cup peanut butter
1 teaspoon vanilla in
1 cup melted butter
1 - 6 ounce package of semi-sweet chocolate chips
1/2 block of paraffin
Mix the first 7 ingredients. Shape into balls. Melt the chocolate chips and paraffin in a double-boiler over boiling water. Dip the balls into the melted chocolate. Place on waxed paper to set.
These may be made ahead of time and frozen - allow to thaw before serving
Lemon Tea Cake
This is one delicious southern cake - ya'll have to try it!
Lemon Tea Cake
2 cups all purpose flour
1/2 teaspoon cream of tartar
1/4 teaspoon baking soda
1/4 teaspoon salt
1 cup unsalted butter, room temperature
1 1/2 cups sugar
5 eggs, room temperature
1 teaspoon lemon extract
1 Tablespoon finely grated lemon zest
1/2 cup freshly squeezed lemon juice
1/2 cup steeped lemon tea
1 cup sugar
Powdered sugar for dusting, if desired
Preheat oven to 325 degrees. Grease a 6-8 cup pan. I use a Bundt pan. Sift together the flour, cream of tartar, baking soda and salt. Set aside.
With mixer on medium speed, cream butter and 1 1/2 cups sugar until light and fluffy. Remember, this takes time, as the objective is to coat every single bit of sugar with butter. Add eggs, one at a time, beating well after each addition. Add lemon extract and lemon zest. Gradually beat in dry ingredients just until the batter is evenly mixed. Overbeating = rubbery cake. Pour into prepared pan and bake one hour or until a toothpick or cake tester inserted in the center comes out clean. Let cake cook in the pan for 10 minutes on a wire cooling rack.
While cake is baking, make syrup by combining the lemon juice, lemon tea and 1 cup of sugar in a small saucepan. Bring this to a boil and cook until the syrup thickens. You are not looking for molasses, just thick like maple syrup. This will take 5 minutes or so. Remove pan from heat and let syrup cool completely.
Pierce the flat side of the cake all over to help it absorb the syrup. Chopsticks work well for this task. Slowly pour syrup over the cake, allowing it to absorb completely. Let cake cool in the pan 10 minutes more. Transfer to a serving platter and allow it to cool completely. Dust cake with powdered sugar if desired and serve.
Serves 12.
Enjoy!
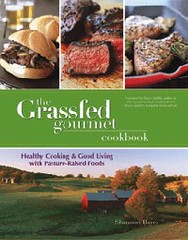
Recipe from Pick TN Products Recipe Booklet
Miscellaneous Helps
~ Pastured meats should be cooked slowly at low heat. Recommended oven temperatures are 275 to 300 degrees. Higher temperatures will dry out and toughen the meat.
~ Roasts that are well done will be less tender than medium or medium-rare roasts.
~ When grilling steak, don't salt the meat until just before eating. Salt will pull the juices from the steak during cooking, making the steak less tender and juicy.
~ A little plain vinegar sprinkled over any meat before cooking it will act as a tenderizer without changing the tast of the meat. Sprinkle 1 or 2 Tablespoons on roasts, steaks, etc. right before cooking. To add a delicious zing, try using balsamic or wine vinegar.
~ Get a meat thermometer and use it! When reading the thermometer, remember that roasts and steaks will continue to cook for 10 minutes or more after being taken off the heat. A meat thermometer should always be inserted into the deepest portion of the meat, but away from fat or bone.
The Most Important Thing To Remember
When cooking pastured beef, OVERCOOKING is the enemy. Trust us when we say that the meat will continue to cook from residual heat for 5-10 minutes after you remove it from the heat source.
Be sure to take your steaks off the grill one level of doneness LESS than that desired, put the steak on a warm plate, cover with aluminum foil and allow the meat to rest for 5 minutes. The meat will continue to cook and should be the desired level of doneness when you sit down to eat it 5 minutes later.
Remember to allow time for your roasts to rest prior to carving. Most of our roasts will cook in the pressure cooker in 30 minutes or less. I count from the time the pressure cooker reaches pressure and usually cook mine for 20-25 minutes. I let the roast rest the time it takes the pressure cooker to release steam so the lid can be removed. You should have great results with this method.
Be sure to purchase a meat thermometer and use it! This is the best way to ensure that you are not overcooking your pastured beef. Most pastured beef is best when cooked to no more than MEDIUM doneness. Remember that the USDA recommended internal temperatures for beef are usually way too high for pastured beef. We use the following guide for our personal cooking:
Rare: 120 degrees
Medium-rare: 125 degrees
Medium: 130 degrees
Medium-well: 135 degrees
Well: 140 degrees
Left-over Roast Beef Ideas
Left-over roast beef can be used in several delicious ways:
- Roast Beef sandwiches - just slice and eat with your favorite fixings!
- Stew Meat for an upcoming stew - chop and add to your stew veggies
- Beef Soup - just add to your favorite beef soup stock recipe
- Tamales - We take left-over roast beef and put it in our Vitamix to chop it to a finer consistency. We add whatever sounds good to get the texture we want - some b-b-q sauce or mole sauce or worcestershire sauce - use your imagination and think about how you want your tamales to taste. Using purchased masa and corn husks from the grocery we follow the instructions on the masa for making the dough (don't worry, it's easy). Put the dough on the corn husks that have been softened in warm water. Spoon in your tamale meat. Roll and steam. Yum!
- Bar-B-Que sandwiches - again, you could use a Vitamix or food processor to chop the beef into a finer consistency, add b-b-q sauce and make a quick meal!
Sirloin Steak Stretcher
We love our pastured beef steaks! Our girls at ages 8 and 5 can each eat a whole sirloin. We all know there are only so many steaks on a steer, so I like to find ways to stretch the steak cuts. One way I do this with sirloin steak is to make Beef Tips. You can also do this with T-bone or Club steak.
I take a package of 2 sirloin steaks and using a sharp filet or boning knife, remove all the fat and any gristle. I then cut the steaks into evenly portioned bite size pieces, about 1/2 inch pieces.
Put all of this in a glass bowl and put in a touch of worcestershire sauce. Let this rest for a few minutes, while the pan heats. Quickly saute the beef over medium-high heat for just a few brief minutes - only about 4 at the most. Remember that the beef will continue to cook from residual heat once removed from the heat. And, these pieces are small, so they cook quickly. I like to see quite a bit of pink still in the middle; this way I know that by the time I get everyone seated the meat won't be too done.
Serve this beef with veggies or rice or whatever sounds good and is fresh for the evening. I can feed my family of 5 with 2 sirloin steaks using this method.
Portion Sizes
Portioning is one topic that we would like to address with all of our friends who have discovered pastured beef. While it is true that pastured beef is miles ahead nutritionally of feedlot beef, it does not mean that it is healthy to vastly increase the portion size! Even if you consume the same size portion as you did with feedlot beef, you will probably be healthier just from the quality of the pastured beef.
Eating the recommended size portions is important to our health today. These portion sizes generally appear exceedingly modest to most Americans; it seems we have gotten used to "super-sizing" our portions of everything!
An easy reference, while not precise but easy to implement, is that your piece of meat should be no larger than the size of the palm of your hand. A child's hand is smaller and so therefore is the corresponding portion of meat.
Vegetable Medley
 Using fresh spring veggies, this one is a treat we like to enjoy just about weekly!
4 yellow squash - cubed (substitute zucchini or eggplant if no squash)
1 large baking potato - cubed (substitute red potatoes if desired)
1 large red onion - sliced thinly (substitute yellow or white onion if desired)
1/2 to 3/4 head of cabbage
olive oil
3 Tablespoons butter
coarsely ground salt
fresh ground pepper
Prepare vegetables. In a large saute pan, place butter and cover the bottom of the pan with olive oil. Heat pan. Add squash, potatoes and salt to taste. Cover and cook over medium to medium high heat until potatoes start to get tender and slightly brown. Add onion and cabbage. Cover and continue to cook until onions are tender and cabbage is wilted. Add olive oil as needed to keep veggies from sticking to pan. Remove lid and brown slightly as needed. Before plating, add fresh ground pepper and a little more salt if desired.
Delicious as is or with your favorite vinagrette dressing.
Serves 6 to 8
Rosemary Potatoes
Since I harvested some fresh rosemary from our herb garden today, it made me think of the rosemary potatoes that my family just loves for me to make. This is not an exact recipe, alter it to suit the tastes of your family!
Red Potatoes or 'New' Potatoes, thinly sliced or cubed
Olive oil
Coarsely ground Sea Salt
Fresh ground pepper
Fresh Rosemary
Note there are no quantities. Make as much or as little as you want to meet your requirements. I like to make the potato slices very thin, like chips, since I tend to like crunchy and crispy potatoes. You could also cube your potatoes, but they would have to cook longer.
Arrange potato slices on a lightly greased baking sheet. I put some olive oil in one of my pump sprayers and lightly mist the potatoes. Then sprinkle with sea salt, fresh ground pepper and the leaves of freshly harvested rosemary to taste.
I bake these in my convection oven on about 375 to 400 degrees until they are crispy. Yum!
Pulao
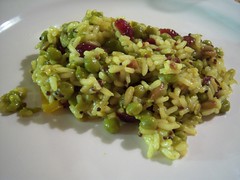
We don't have this often, but it is one of my husband's favorite Indian dishes.
1 cup basmati or white or brown rice, uncooked
1/4 cup ghee or butter
3 cups water
1 Tablespoon sunflower oil or olive oil or coconut oil or a mixture
1/2 teaspoon mustard seeds
1 teaspoon tumeric
1 cup green peas
1/2 cup green bell pepper, chopped (optional)
1/8 cup cashews, chopped and/or 1/8 cup pumpkin seeds and/or 1/8 cup sunflower seeds
1/4 cup raisins or craisins
1/2 teaspoon sea salt
1-1/2 teaspoons curry powder, mild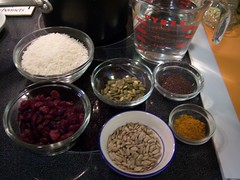
In a medium-sized saucepan heat the ghee or butter. Add the rice. Stir constantly over low heat for 3 minutes, watching carefully. When it is coated all over and glistens slightly, add water. 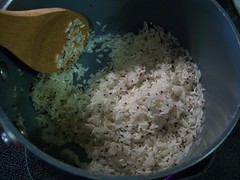
Cook rice until soft: 15-20 minutes for basmati, 35-45 minutes for brown rice.
In a medium-sized skillet heat oil and add mustard seeds. 
When they pop, add tumeric and vegetables. If you've never cooked with tumeric before, be aware that it will stain wood, rubber and cloth a bright yellow. Cook for 3 to 4 minutes. 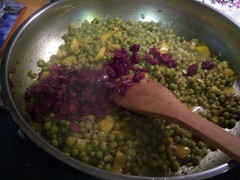
Add nuts and/or seeds and raisins and mix well. 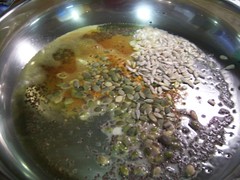
Add cooled rice, fluffing it with a fork as you take it from its pan. Add salt and curry powder. 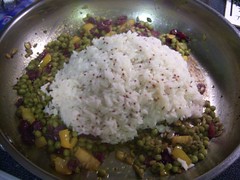
Mix well. Serve.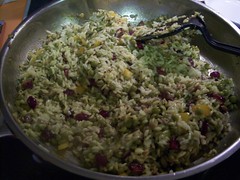
This goes well with yogurt and a side dish of eggplant.
Serves 5 to 6
Recipe Adapted From: The Ayurvedic Cookbook
Hungarian Short Ribs
2 to 3 Tablespoons vegetable oil
4 pounds M4-D Ranch grass-finished beef short ribs (bone-in)
2 medium onions, sliced
1 can (15 ounce) tomato sauce
1 cup water
1/4 cup packed brown sugar
1/4 cup vinegar
1-1/2 teaspoons salt
1-1/2 teaspoons ground mustard
1-1/2 teaspoons Worcestershire sauce
1/4 teaspoon paprika
Hot cooked noodles
In a dutch oven, heat oil over medium-high heat. Brown ribs on all sides. Add onions, cook until tender. Combine the next 8 ingredients; pour over ribs. Reduce heat, cover and simmer for 3 hours or until the meat is tender. Skim any fat. Reduce or thicken pan juices for gravy. Serve meat and gravy over noodles.
Serves 6 to 8
Hint: Using Hungarian paprika will make these ribs spicy.
Delicious Pot Roast
1 teaspoon salt
1/2 teaspoon onion powder
1/2 teaspoon pepper
1/2 teaspoon garlic powder
1 M4-D Ranch grass-finished beef roast (3-4 pounds)
1 Tablespoon olive oil or vegetable oil
3/4 cup water
1 large onion, chopped
1/4 cup green pepper, chopped
2 garlic cloves, minced
2 bay leaves
2 teaspoons dried parsley flakes
1/4 teaspoon dried thyme
Combine first 4 ingredients. Rub over roast. In a dutch oven, heat oil over medium-high heat. Brown roast on all sides; drain. Add water, onion, green pepper and seasonings. Cover and bake at 325 degrees for 2-1/2 to 3-1/2 hours or until tender. Remove roast to a warm serving platter. Discard bay leaves and skim any fat. Thicken pan juices for gravy. Serve roast with warm vegetables.
Serves 8 to 10
Hint: Leftovers can be frozen in individual portions for quick meals!
Baked Beef Stew
2 pounds M4-D Ranch grass-finished beef stew meat (1 inch cubes)
6 medium carrots, cut into strips or chunks
3 medium potatoes, peeled and quartered
1 medium onion, sliced into rings
1/2 cup thickly sliced celery
1 cup diced canned tomatoes
1 cup water
3 Tablespoons quick-cook tapioca
1/2 cup soft breadcrumbs
In a large bowl, combine all ingredients. Spoon into a 3 quart baking dish that has been greased. Cover and bake at 325 degrees for approximately 3 hours or until meat is tender.
Hint: Chuck roast can be cut into cubes for stew meat.
Serves 6
Southwestern Beef Brisket
1 M4-D Ranch grass-finished beef brisket (approx. 3 pounds)
1 teaspoon salt
1/2 teaspoon pepper
2 Tablespoons vegetable oil
1-1/2 cups water
1 can tomato sauce (8 ounces)
1 small onion, chopped
2 Tablespoons red wine vinegar or balsamic vinegar
1 Tablespoon chili powder
1 teaspoon dried oregano
3/4 teaspoon ground cumin
1/2 teaspoon garlic powder
1/4 teaspoon salt
1/4 teaspoon cayenne pepper
3-4 medium sweet red peppers, cut into strips
1-1/2 cups sliced carrots ( in about 1-inch chunks)
Season beef with salt and pepper. Place in a dutch oven, fat side up. Combine the next 10 ingredients and pour over the brisket. Add red peppers and carrots. Cover and bake at 325 degrees for approximately 3 hours or until tender. Remove meat and vegetables to a warm serving platter. Skim any fat. Reduce pan juices for gravy. Slice meat thinly across the grain; serve with vegetables and gravy.
Serves 8 to 10
Shepherd's Pie
2-1/2 pounds potatoes, peeled and cooked
1 to 1-1/2 cups sour cream (8 to 12 ounces)
Salt and pepper to taste
2 pounds M4-D Ranch grass-finished ground beef
1 medium sweet red pepper, chopped
1/2 cup chopped onion
1 can whole kernel corn, drained
1 can condensed cream of mushroom soup
1/2 cup milk
1 teaspoon garlic powder
2 Tablespoons butter, melted
Minced fresh parsley or shredded cheese
Mash cooked potatoes with sour cream. Add salt and pepper to taste; set aside. In a skillet cook beef, red pepper and onion until meat is browned and vegetables are tender. Drain. Add corn, soup, milk and garlic powder; mix well. Spread meat mixture in an ungreased 3 quart baking dish. Top with mashed potatoes; drizzle with butter. Bake uncovered at 350 degrees for 30 to 35 minutes or until heated through. Sprinkle with parsley or shredded cheese.
Serves 8-10
Old-Fashioned Swiss Steak
1/2 cup all purpose flour
2 Tablespoons all purpose flour
2 teaspoons salt - divided
1 teaspoon pepper - divided
1/2 teaspoon garlic powder
2 pounds M4-D Ranch boneless beef round steak, tenderized and cut into serving size pieces
3 Tablespoons vegetable oil
2 cups chopped green pepper
1 cup chopped celery
1 cup chopped onion
1 garlic clove, minced
2 cans (14.5 ounces each) diced tomatoes, undrained
1 cup beef broth
1 Tablespoon soy sauce
1/4 cup cold water
In a large plastic bag or bowl with lid, combine 1/2 cup flour, 1 teaspoon salt, 1/2 teaspoon pepper and garlic powder. Add beef a few pieces at a time and shake to coat. Remove meat from bag. Heat oil in a dutch oven over medium-high heat. Brown meat on both sides. Add green pepper, celery, onion and minced garlic. Cook and stir for 10 minutes. Add tomatoes, beef broth, soy sauce, remaining salt and pepper. Cover and bake at 325 degrees for 2 hours or until tender. Remove from oven and return to stove top to skim any fat. In a small bowl, combine cold water and 2 Tablespoons flour, stir into pan juices. Bring to a boil over medium heat, stir constantly until thickened.
Serves 6-8
Dehydrating Fruits
At least once a week after breakfast and before we get started with school, the girls will have a blast with a dehydrating project! They love to dehydrate fruit for their snacks. Here are some of their favorites. They are much cheaper to make at home than the ones you buy in the stores ~ an added plus to home dehydration is the fruits don't have the sulfur preservatives!
MANGO - peel, slice thin and dehydrate
APPLE - peel, core, slice thin and dehydrate
PINEAPPLE - peel, core, slice thin and dehydrate
BANANA - peel, slice thin, soak for a few moments in lemon juice and dehydrate. The lemon juice helps keep the chips from discoloring and it makes the banana chips taste like they have been dipped in honey! DELICIOUS!
FRUIT LEATHER / FRUIT ROLL-UP - we make our own on the dehydrator sheet using homemade Pear Butter, Peach Butter, Apple Butter or Applesauce.
Scones
Scones are one of the favorite breakfast and snack items at our house. They are so easy to make and can have so many variations!
Basic Recipe:
2 cups unbleached all-purpose flour
2-1/2 teaspoons baking powder
1/4 teaspoon salt
1/4 cup sugar (can be decreased or omitted, depending on variety you make)
4 Tablespoons butter (1/2 stick)
3/4 cup milk (can use cream for added richness if desired)
Preheat oven to 400 degrees. Sift flour, baking powder, salt and sugar. Cut in butter until mixture is crumbly. Add milk and blend well; the finished dough should be sticky. Flour a flat work space and knead the dough for about 1/2 minute. Press out to about 1/2 inch or less thickness and cut into any shape desired. Triangles are traditional. Bake for 15 minutes and immediately remove from baking pan to cooling rack. Yield is about 12 depending on shape and size.
Varieties:
Cranberry Orange: After cutting in butter and before adding milk, stir in with a fork about 1/2 cup dried cranberries and orange zest to taste. You can also stir in some chopped walnuts. Proceed with the rest of the recipe as written. These are a breakfast favorite at our house dipped in fresh, local honey!
Citrus: After cutting in butter and before adding milk, stir in with a fork lemon and orange zest to taste. You can also stir in some chopped walnuts. Another breakfast favorite with local honey!
Chocolate Chip: After cutting in butter and before adding milk, stir in with a fork about 1/2 cup milk chocolate chips and proceed with the recipe as written. For these, you want to be sure to add the 1/4 cup of sugar. These will hardly last the afternoon at our house!
Meatballs in Onions and Sour Cream
4 slices bread, crusts removed
3/4 cup of milk
4 medium onions, sliced
3 Tablespoons butter
1 teaspoon Dijon mustard or 1/4 teaspoon dried mustard
1 pound M4-D Ranch grass-finished ground beef
1 teaspoon salt
Freshly ground pepper to taste
1 Tablespoon minced parsley
Paprika to taste or omit
1-1/4 cups sour cream
Soak the bread in the milk for about 20 minutes. Meanwhile, saute the onions in the butter very slowly, covered so they do not brown, until they are translucent. When the bread is swollen with milk, break it up with a fork and pour off any liquid. Mix the bread lightly with the ground beef, adding salt, pepper, parsley and mustard. With a light hand, form the meat mixture into meatballs just a little smaller than golf balls. Put the meatballs in with the onions, cover, and cook gently, turning each one carefully after about 5 to 8 minutes. Cook on the other side until desired doneness is reached. They should be soft, not browned, and just cooked through. Add the sour cream and heat, stirring it in gently around the meatballs. Dust with paprika and serve with rice or egg noodles.
Serves 4.
Optional: I sometimes also add green peas to the mixture to add a little color and fresh veggie to this dish. A terrific meal with a light salad.
Impossible Cheeseburger Pie
1 pound M4-D Ranch grass-finished ground beef or turkey
1/2 cup chopped onion
1/2 teaspoon salt
1/4 teaspoon pepper
3/4 cup flour
2 teaspoons baking powder
1/4 cup oil
3 eggs
1-1/2 cups milk
1 zucchini, sliced (optional)
1 cup shredded cheese
Preheat oven to 400 degrees.
Brown ground beef or turkey, onion, salt and pepper. Drain off any grease. Put in a greased 12 x 7 inch baking dish. In a bowl mix flour, baking powder, oil, eggs and milk for 1 minute. Pour over ground beef/turkey mixture. Arrange sliced zucchini over pie and sprinkle on cheese. Bake for 30-35 minutes.
Serves 5-6
Recipe Courtesy of The Feingold Association
Homemade Marshmallows
This is a favorite of the girls and so easy to make.
2 Tablespoons plain, unflavored gelatin (2 envelopes)
1/2 cup cold water
2 cups granulated sugar
1 cup hot water
pinch of salt
2 teaspoons pure vanilla
powdered sugar
Soften gelatin in the cold water. Combine the sugar and hot water. Boil to a soft ball stage (236-238 degrees). Add gelatin and salt; beat until stiff. Add vanilla. Beat thoroughly. Pour into an 8 x 8 inch pan that has been dusted with powdered sugar. Allow marshmallows to stand until stiff enough to hold its shape. Cut into strips. Remove from pan. Cut into squares and roll in powdered sugar.
Recipe Courtesy of The Feingold Association
Knives and Cutting Boards
Here are 13 tips when buying kitchen knives and cutting boards:
Kitchen Knives: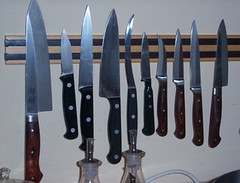
- You can get by in the kitchen with just 3 really good knives~ Chef, Serrated and Paring.
- Chef knife is usually 8 to 10 inches long.
- Serrated knife is for soft foods, cold cuts, bread and tomatoes.
- Paring knife is usually 3 to 4 inches long.
- Look for knives that will hold an edge - no knife can be "ever sharp".
- Bolster is what provides balance during use.
- A full tang means the blade goes all the way through to the end of the handle. Some knives have an enclosed handle and some have handles where you can see if the tang goes to the end or not.
- Professional sharpening is usually needed about once a year. The "sharpening steel" is not for sharpening, but to keep the edge on the knife. You should use the steel on your knives every time you get ready to use the knife.
Cutting Boards:
- Should be wood or plastic. Glass boards will ruin your knife edge. You want them sturdy and thick, not thin and flimsy.
- I use plastic for RAW MEAT, because they can go right into the dishwasher. I use wood for everything else, including cooked meat.
- What to look for in a wooden cutting board: Maple is the best for care and ease on your knives. Get one that is as big as you can afford. You really only need one, as it will last a lifetime with proper care.
- Features to look for include a carving well, juice trough and finger wells.
- Be sure to use food safe mineral oil on the wood when it looks thirsty to keep it from splitting or cracking. Never put it in the dishwasher. Hand wash with soap and water then dry immediately.
Essential Kitchen Tools
We all have cook books that list all the essential cookware and tools for a well-rounded kitchen. I am going to share with you some of the tools I use the most and why they are an important implement for my kitchen.
1. Oven Thermometer ~ The only way to know if the temperature of your oven is correct is to have an oven thermometer and LEAVE IT in the oven. Most problems with cakes made from scratch that do not turn out as expected can be traced to oven temperature problems.
2. Refrigerator and Freezer Thermometers ~ Do any of us really know what the A,B,C or 1,2,3 on our refrigerators or freezers mean? Of course not. Put a good thermometer in each place. Leave it overnight and check the temperature the first thing in the morning after the doors have been closed all night. Make adjustments as necessary and leave the thermometers there for spot checks.
3. High Quality Chef Knives ~ You really only need 3 good knives:
A) Chef knife - usually 8 to 10 inches
B) Serrated knife - for soft foods, cold cuts, bread and tomatoes
C) Paring knife - usually 3 to 4 inches
What to look for in quality knives:
1. Will hold an edge.
2. Bolster - provides balance
3. Full tang - blade goes all the way to the end of the handle.
Plan to have them sharpened professionally about once a year - this usually costs $2 to $3 per knife.
A STEEL is not for sharpening, but just to keep the edge on the knife. You should use your steel on the knife edge every time you get ready to use your knife in the kitchen. And of course it should go without saying that your kitchen knives are for use on FOOD ONLY!
4. Wooden and Plastic Cutting Boards ~ Never use glass cutting boards as they will ruin the edge on your knives. I use plastic for raw meat only because it can be put directly into the dishwasher. I use wood for cooked meat and everything else.
What to look for in a Wooden Cutting Board: Maple is the best for care and ease on knives. Get one that is as big as you can afford - you really only need one because it will last a lifetime with proper care. Features you can look for: juice trough, finger wells, carving side. Treat your wooden cutting board with care - never put it in the dishwasher. Hand wash and dry immediately. Use a food safe mineral oil whenever the wood looks thirsty to keep it from cracking or splitting.
5. Pastry Knife ~ Makes quick work of incorporating butter into flour mixtures for scones, biscuits, etc. I like the one from Pampered Chef.
6. Microplaner and Zester ~ These are wonderful little tools for grating fresh spices, cheeses, making zest and garnish. There are usually two types of zesters: one with holes only on top and one with holes on top and one larger hole on the side. The larger hole on the side is for making curls for garnish. Remember to never zest into the white part of the fruit because this part is bitter. You can freeze zest to use anytime - so never throw out your citrus fruits without zesting them first!
7. Silicon Spatulas and Basting Brushes ~ These are very heat resistant. I find is worth paying a little extra to have these on hand. With the silicon basting brush you never have to worry about getting those bristles on your food!
8. Cooling Racks ~ These are essential. If you don't use a cooling rack and instead place your bakeware on the stove or countertop, you are holding in heat and continuing to cook your baked item. Also, cakes will have a soggy bottom if they cool in the pan placed on the stove or countertop instead of on a cooling rack. Be sure to purchase a sturdy one to support your heaviest bakeware.
9. Cake Tester ~ I love using these instead of toothpicks that are never long enough. I have mine from Pampered Chef.
10. Parchment Paper ~ Do most of you put your cheeses into plastic baggies and toss them into the fridge? The result is wet, slimy cheese. Instead, wrap your cheese in parchment paper and then put it into the plastic bag. No more wet, yucky cheese. It will last longer too. This also applies to lunchmeat you get at the deli. I also use my parchment paper for many baking uses in the oven.
11. Pastry Cloth ~ I know, our grandmothers used to just throw some flour on the countertop and start working that dough. But when you put flour on the countertop, what usually happens is the flour gets incorporated into your dough and can make it tough. A pastry cloth is meant to keep your dough from sticking without incorporating the extra flour. Try one - you'll love it.
12. Meat Thermometers ~ These can be really helpful. There are two types: instant read and oven. The instant read is used for grilling and once the meat is removed from the heat. It is not heat tolerant for more than 15-20 seconds. These usually have a very small dial. Oven thermometers have a large, easy to read dial because they are meant to go into the oven with the meat and allow you to read the dial through the window of your oven. It should be placed in the thickest part of the meat but not all the way through to the pan or through fat or touching bone.
13. Cookie Sheet vs Jelly Roll Pan ~ What most people call a cookie sheet with the 1/2 inch high sides all the way around is actually a jelly roll pan. A cookie sheet is completely flat and allows for very even cooking. A jelly roll pan causes the heat in the oven to go up over the sides and down into the pan. If you have cookies that seem to cook unevenly, you need to make sure you are using a cookie sheet and not a jelly roll pan.
Seasoning Cast Iron Pans
Here's how to do it properly so the pores will seal out odors:
A. Lightly oil the pan with vegetable oil. Don't forget to do the lid too.
B. Place the pan and lid in a 350 degree oven for 1 hour.
C. Make sure you put the pan in the oven upside down. This is essential or you will bake the oil in and have a sticky residue.
D. You might need to season the pan 2 or 3 times before you first use it.
Store your cast iron with paper towels between them to absorb any excess moisture and prevent rust. If you have sticky residue, use lots of elbow grease and steel wool with no detergent, then re-season. For rust, you must scrub and re-season.
Pots And Pans
These are the pots and pans that I use in my kitchen for most of my cooking:
1. CAST IRON ~ (made in TN - there is a Lodge factory outlet near Chattanooga) ~ This is my number one choice for many reasons. It is very cost effective. It is durable and will last a lifetime. It is an excellent heat conductor. Most people today don't use cast iron because they do not know how to season it properly. Although you can buy pre-seasoned cast iron today, I still prefer to season my own.
How to Properly Season Cast Iron: Here's how to do it properly so the pores will seal out odors:
A. Lightly oil the pan with vegetable oil. Don't forget to do the lid too.
B. Place the pan and lid in a 350 degree oven for 1 hour.
C. Make sure you put the pan in the oven upside down. This is essential or you will bake the oil in and have a sticky residue.
D. You might need to season the pan 2 or 3 times before you first use it.
Store your cast iron with paper towels between them to absorb any excess moisture and prevent rust. If you have sticky residue, use lots of elbow grease and steel wool with no detergent, then re-season. For rust, you must scrub and re-season.
2. Stainless Steel with Copper Bottoms ~ I use these for a lot of everyday cooking. I look for heavy duty pans with a riveted handle. I want to make sure the handle does not come off! Also, a riveted handle will allow you to go from cooktop to oven (what I do with my breaded lamb chops - yum!). Copper is a great head conductor.
Microwave Care
Microwaves must be very clean to work properly. Microwaves work when short waves generate friction, which generates heat and cause the food to cook.
To clean:
Simply put water in a large bowl and bring it to a boil. Keep the door closed and allow to steam for about 5 minutes, then wipe clean. You can add lemon juice to the water if odors are a problem.
Coverings:
~ Never use aluminum foil
~ Never use Ziploc plastic bags
~ Paper towels are used if you want steam to escape
~ Waxed paper is used if you want to keep steam in
Food Arrangement:
~ Put big items on the edges and smaller items in the middle because the middle is the last to heat up.
Removing Freezer Odors
~ Objectionable odors in the freezer may be caused by food that has been left in the freezer too long, food that has been packaged improperly or by food that spoiled when the electricity was off.
~ Several different solutions can be used to clean the interior surface of the freezer. Try these one at a time. Be sure to rinse the freezer surfaces well and dry them before trying another solution.
~ Do not mix ingredients in different solutions. Baking soda and water might do the job. Use 2 Tablespoons of baking soda to a quart of water.
~ If the odor remains, try a vinegar and water solution. The formula is one cup of vinegar to one gallon of water.
~ Household chlorine bleach may be effective. Use 1/2 cup of bleach to one gallon of water. No matter which solution you choose, rinse well with clear water after cleaning.
~ If odor still remains, you can try leaving a crumpled newspaper in the freezer for a time.
~ Charcoal briquettes or activated charcoal in an open container may help remove odor.
~ Other choices could include coffee grounds or kitty litter left in an open container in the freezer.
~ If odor-causing moisture has been absorbed by the insulation of the freezer, the odor may be impossible to remove. If the interior surface has been cleaned and rinsed and an unpleasant odor still remains, you may have to replace the insulation.
~ In the meantime, if you must use the freezer, be sure to double-wrap all food placed inside. As soon as you take food from the freezer, remove the outer wrapping before the food thaws. The odor should be left in the outer wrapping so the food will not be affected.
Refrigerator Facts
Believe it or not, there are proper ways to store foods in your refrigerator. The refrigerator is meant to keep cold foods cold, not to make hot foods cold. Always get hot foods to at least room temperature first before placing them in the refrigerator. Store your foods in shallow dishes to ensure even cooling.
DOOR
~ Never store dairy products in the door because it is too susceptible to temperature variations. Butter is okay if it is in a lidded compartment that protects it from outside temperature when the door is open.
~ The door is perfect for juices and condiments.
DAIRY
~ Always goes somewhere inside the refrigerator on a shelf
EGGS
~ Always go inside the refrigerator and kept in a carton. Use the cute little egg basket for something else.
MEATS
~ Put them on the bottom shelf which is usually the coldest part of the refrigerator. Always put on a plate or in a bowl in case of leakage.
FRUITS AND VEGGIES
~ Usually have separate drawers that are humidity controlled
~ Remove them from any plastic grocery bags
~ Put paper towels in the bottom of the drawers to help absorb moisture and to catch any leaks
Helpful Household Hints
1. COMPOST: Need extra compost material? Ask a neighbor to save their coffee grounds and egg shells for you. Most people drink coffee and eat eggs. It is very convenient to save these 2 compost materials in a coffee can or other container. Collect from your neighbors weekly. Then surprise them with some fresh garden tomatoes or a delicious bag of garden greens as a thank you for their efforts!
2. CLEANING: If you are like me, you despise using store-bought chemicals to clean your home. They are expensive, have strong smells and if you can find the ingredient listing on them, most are chemicals we cannot even pronounce. Not things I want around my children, for sure. I clean virtually my entire home with a vinegar, water and orange concentrate solution. In a 32 ounce spray bottle I mix 15 ounces of white vinegar, 15 ounces of water and 2 Tablespoons of Earth Friendly Products Concentrated Orange Plus All Purpose Cleaner (I've had this 22 ounce bottle of concentrate forever!). Invert the bottle a few times to mix the products together and clean away! I clean my stove, kitchen counters, mirrors, windows, glass doors, kitchen floor, car windows, bathrooms, kitchen table, etc. ~ basically anything you would use Windex or 409-type products on. When you use this on mirrors or glass doors for the first few times, it may take some elbow grease to get them streak-free because of the soap scum buildup from the other cleaning products. Use a piece of newspaper and before you know it they will shine!
3. LAUNDRY: For laundry, my all-time favorite products are the Shaklee Laundry Products. We use the fragrance-free powdered laundry detergent - it only takes 1 to 2 ounces for a full load (that's 2-4 Tablespoons - talk about economical)! Most people use WAY too much laundry detergent and have residue in their clothes and their washer - try this test - put a small load into your washer and turn it on without adding any detergent. If you still get suds, then you've been using too much detergent and have soap residue in your clothes.
Note: If you are interested in getting Shaklee products without having to sign up to distribute, zip me an email, as I am already signed up as a distributor.
4. LAUNDRY: I make my own fabric-softener that I spray directly into the dryer from the Shaklee Soft Fabric Concentrate. I mix a solution of 1/3 of the Softer Than Soft with 2/3 water and spray 6 to 8 sprays in the dryer before adding my clothes.
5. DISHWASHER: Again, I love the Shaklee dishwashing powder. It only takes 1 to 2 teaspoons (yes, that's correct) of their powdered detergent for a full load of dishes. One package of this dishwashing powder usually lasts me about 6 months!
6. HAND CLEANING: Most of us do not wash our hands long enough. Remember that fingernails are dirt and germ magnets. We should wash our hands in the hottest water we can stand with soap for at least 20 seconds. If you are teaching children, 20 seconds is the ABC song once or the Happy Birthday song twice!
7. KITCHEN SINK: To make your stainless steel sink shine like new, fill it with hot water and 1 cup of bleach all the way to the rim. Leave it for at least one hour. Drain and RINSE WELL. Then use some cleanser and be sure to rinse it clean. You can clean around the rims with a sharp utensil. Faucets clean well with an old toothbrush and dental floss. Wipe the sink clean with spray cleaner of your choice. If you wipe your sink dry at night and occasionally wipe with spray cleaner, it will shine for a long time.
8. GARBAGE DISPOSAL: To keep it smelling clean, cut grease and keep the blades sharp you can occasionally run ice cubes and lemon wedges through it.
Pressure Cooking
I absolutely LOVE my pressure cooker. I use this much more often than my crock pot, mainly because the day tends to get away from me before I remember to get my crock pot started. With my pressure cooker, I can start a roast thawing in a sink of water at 3:30 or 4:00 in the afternoon, cook it in the pressure cooker for 20-30 minutes depending on thickness, and still have dinner ready and on the table by 5:00 or 5:30!
My pressure cooker is stainless steel and is a 6 quarter cooker. I wouldn't suggest anything smaller if you want the ability to cook a wide range of items.
Important Pressure Cooking Tips:
- Please remember that pressure cooking speeds up the time that your meat is cooked. Most roasts and items like short ribs can be cooked in 20-30 minutes using a pressure cooker.
- Please follow the instructions that come with your pressure cooker and do not guess at cooking times.
- If meat is pressure cooked too long, it will become tough - many make the mistake of thinking that this means the meat is not done and needs to cook longer - this is not the case.
- If you do overcook in your pressure cooker, you can cook the meat longer to a point where it can be shredded for beef bar-b-que sandwiches or other dishes.
- For excellent information about proper pressure cooking and recent pressure cooker recalls - please visit this site: missvickie.com.
About Herbs and Spices
Types of Salt:
~ Kosher - is just salt.
~ Table - is mined and has anti-caking agents and iodine added.
~ Sea - is my favorite. It is evaporated sea salt and contains trace minerals.
About Olive Oils:
~ Extra Virgin - comes from the 1st press of the olives. This has the most flavor.
~ Olive - comes from the 2nd+ presses of the olives and does not have as strong a flavor.
~ Light - goes through a super filtration process and is lighter in color and flavor. This filtration process is done to increase the smoking point. Use this type only when sauteing.
Fresh Herbs versus Dry Herbs:
~ I always prefer fresh herbs when I can get them. The ratio for fresh vs. dried for recipes is 3:1.
Spices:
~ I try to buy whole spices whenever possible and grate or microplane or grind them just prior to use. This provides for a better, fresh flavor.
Did You Know?
~ Cream of Tartar - is a white crystalline ACID on the inside of wine barrels during the aging process. It is chipped off and gives us cream of tartar.
~ Baking Soda - is a leavener that works in the presence of an ACID. You can test for freshness of your baking soda using warm vinegar. It reacts immediately when it gets wet. Bubbles make light and airy cakes and are why we cannot delay once a cake batter is ready to bake or the bubbles will run out of steam!
~ Baking Powder - is usually double-acting. Double-acting means it works when wet and when hot. You test for freshness by using water and looking for bubbles. It is used in doughs because of the need for handling before baking and the delay in cooking.
General Cooking Tips
General Information:
1. Keep your oven door closed when baking. Use a thermometer and look through the window. Most baking problems are caused from the oven door being opened too often and the temperature fluctuating in the oven. Always start out at the lowest baking time and increase if needed.
2. Basting meats in the oven is totally un-necessary - it prolongs cooking time because it lowers the oven temperature every time you open the door.
3. Cooking meat in the oven is just like baking, except it is called roasting.
4. The bigger the roast, the lower the oven temperature should be.
5. For roasting, bring the item to room temperature first. This eliminates crusting on the meat and doesn't lower the oven temperature as greatly when you put your meat in. Always cook roasts with the fat side up. Browning beforehand is not really necessary. Remember to allow all meats to rest after cooking. Roasts should rest for 10-15 minutes before carving for ideal juiciness and tenderness.
6. Marinades: Must have three things to work properly. Once you know these three, you can experiment making your own!
A. Oil = moisturizer. If your meat is dry, it didn't have enough oil.
B. Acid = tenderizer. If your meat is tough, you didn't have enough acid.
C. All else = flavor. Soy sauce, Worcestershire sauce, etc - these add flavor.
7. A little plain vinegar sprinkled over any meat before cooking it will act as a tenderizer. Sprinkle 1 to 2 Tablespoons on roasts, steaks, etc. right before cooking. This does not affect the taste. For a delicious zing, though, try using balsalmic or wine vinegar.
Testing For Doneness
There are a couple of ways to test for doneness WITHOUT a meat thermometer:
1. Turn your palm up, spreading fingers far apart, then:
~ Press the center of your palm - this is how a Medium to Well-Done steak should feel
~ Below your index finger - feels like a Medium steak
~ Below your thumb - feels like Medium-Rare steak
~ Beneath your little finger - feels like Rare steak
2. To test for doneness, press the meat with your finger:
~ Rare meat will be soft and wobbly
~ Medium will have a springy firmness
~ Well-Done will feel very firm and unyielding
PERFECT Grilling
Remember these hints for perfect grilling:
P reheat your grill - wait until it is the right temperature to begin
E nsure best results with at least CHOICE grade steaks
R etain flavorful juices - use only tongs or a spatula to turn, never a fork
F lip the steak only once
E ach side should be grilled for about 3 to 6 minutes depending on thickness and desired doneness
C heck doneness with a meat thermometer for best results
T ime to enjoy your meal!
Successful Grilling
~ Steaks should be allowed to come to room temperature before cooking for optimal tenderness. When cold meat is put onto a hot grill, it causes the muscle fibers to seize and can result in a tough texture after cooking.
~ Steaks are optimum in flavor and texture when cooked to no more than medium doneness.
~ When steak is cooked, the marbling melts at high temperature. This helps to make the beef juicy and tender. Beef with very little marbling is often dry after it is cooked. This is especially true if the steak is cooked a long time. Marbling also gives beef its unique flavor. A good steak will have quite a bit of marbling.
~ Prepare charcoal for grilling. When coals are medium, ash-covered (about 30 minutes), spread in a single layer and check cooking temperature. Position cooking grid. To check temperature, carefully hold the palm of your hand above the coals at cooking height. Count the number of seconds you can hold your hand in that position before the heat forces you to pull it away - 4 seconds for medium heat.
~ Leave a small amount of outside fat on the steak while it is cooking to preserve juiciness. Trim the fat off AFTER it is done cooking.
~ Season beef with herbs or spices as desired, but hold the SALT until just before eating. Salt will pull the juices out of the steak during cooking causing less tenderness.
~ Keep the steaks at least 2 to 3 inches above the heat when grilling outdoors - remember - the closer the heat, the tougher the meat!
~ When turning steak, NEVER use a fork - only use tongs. The fork punctures will release the meat juices and leave the steak tough and dry.
~ Grilling at medium to medium-low temperatures ensures even cooking. If the temperature is too high, beef can char and become overcooked on the outside before the interior reaches the desired doneness.
Beef Cooking Terminology
Roasting ~ is just like baking, except you are cooking meat. This can be either with dry heat or moist heat or a combination of the two. For Dry-Heat, place meat fat-side up, on a rack in an uncovered roasting pan. Roast in the oven at 275 to 325 degrees. Searing the flesh side may increase moisture retention. Meat may be cooked like this in a rotisserie. For Moist-Heat the meat is either partially or tightly covered to keep it from drying out. If covered to tightly, the meat will be steamed instead of roasted.
Broiling ~ is most suitable for tender steaks like Rib-eye, T-bone, Porterhouse, Sirloin, Club, Filet. This is best for meat that is 3/4 to 1 inch thick. Trim the excess fat to prevent curling. Place meat 3 to 3.5 inches from the heat in the oven with the temperature set to broil. Broil until meat is brown on one side, turn using tongs and broil until desired doneness. Be sure to grease the broiler rack to prevent sticking and line the broiler pan with foil or 1 inch of water to aid clean-up.
Pan Frying / Sauteing ~ Brown meat on both sides in a small amount of shortening or oil of your choice. Do not cover or cover only minimally to prevent splatter. Cook at a moderate temperature, turning occasionally until done. An easier method could be something like the Foreman Grill.
Braising ~ This is sometimes called pot roasting or stewing. You can carefully brown the meat prior to braisingm but this is not necessary. Add seasoning and a small amount of liquid. Cover and cook at low temperature - steaming the meat - until tender. Keep tightly covered and turn occasionally to keep the meat moist. Braising can be done on the stovetop or in the oven.
Freezer and Fridge Storage Times
To help ensure optimal enjoyment of your grass-finished beef, here are the recommended storage times for refrigerator and freezer.
Fresh Steaks and Roasts
- Fridge: 3 to 4 days
- Freezer: 6 to 12 months
- Fridge: 1 to 2 days
- Freezer: 3 to 4 months
- Fridge: 3 to 4 days
- Freezer: 2 to 3 months
Remember that the longer you store your beef in the freezer, the less vitamin content it will have when you finally prepare it.
Also, periodically check for any packages with a broken vacuum-seal. Plan to cook that package soon to prevent the risk of freezer burn and off flavor.
What Are The Grades of Beef and What Do They Mean?
There are 5 primary grades of beef:
PRIME ~ is produced from young, well-fed beef cattle. Only about 2% of the beef in the U.S. is graded Prime. It has abundant marbling and is generally sold in restaurants and hotels. Prime Roasts and Steaks are excellent for dry-heat cooking (roasting, broiling and grilling). This grade is the most expensive to purchase.
CHOICE ~ is high quality, but has less marbling than Prime. Choice Roasts and Steaks from the loin and rib will be very tender, juicy and flavorful. Like Prime, these are suited to dry-heat cooking. Many of the less tender cuts, such as those from the rump, round and blade chuck, can also be cooked with dry heat, but be careful not to overcook these. Using a meat thermometer takes the guesswork out of cooking and assures a safe internal temperature.
SELECT ~ is very uniform in quality and normally leaner than the higher grades. It is fairly tender, but because it has less marbling, it may lack some of the juciness and flavor of the higher grades. Most meat purchased in the grocery today is graded SELECT. Only the tender cuts (loin, rib, sirloin) should be cooked with dry heat. Other cuts should be marinated before cooking or cooked with moisture to obtain maximum tenderness and flavor.
Standard and Commercial ~ frequently sold as un-graded or as store-brand meat.
Utility, Cutter and Canner ~ are seldom, if ever, sold at retail but are used instead to make hamburger and processed products.
About Us
Here you will find some of our favorite recipes and beef cooking tips, thoughts about cooking implements and tools, a listing of my favorite cookbooks and some helpful hints to make cooking for your family something you can really enjoy!
At our house, we try as much as possible to prepare the majority of our foods from scratch, using healthy ingredients. Now, do I grind my own grain for my bread every day? Do we grow all of our own vegetables? No, we're not quite there yet. But we do try to pay close attention to what we eat, how it is prepared and how and where it was grown or raised. We try to eat a diet free of artificial flavors, preservatives and colors.
It is amazing to me the items in the grocery that have artificial colors added for no good reason I can see (almost everything does - check it out next time you go shopping). For example, why does chocolate cake mix need red food coloring? Why does sweet relish in the store have yellow food coloring? What ever happened to all natural, pure vanilla flavoring instead of vanillin? Why does the baby wash need to be purple or blue? What is with all the corn syrup and partially hydrogenated fats?
These are things I ask myself when I shop and try to teach my girls to have inquirying minds about. I can't help but think that people ate healthier food in my grandmother's day; food grown on their own homestead with their own hands from seeds they'd saved ~ when butter was homemade and your ice cream wasn't cotton-candy flavored.
I hope you enjoy these recipes as much as my family does.
Kitchen Helps
These links will take you to posts about various kitchen helps that I've found throughout the years that have helped me keep my kitchen running smoothly! Please zip me an email if you have any questions!
Essential Kitchen Tools
Kitchen Knives and Cutting Boards
Helpful Household Hints
Refrigerator Facts
Removing Freezer Odors
Microwave Care
Favorite Pots and Pans
Seasoning Cast Iron Pans
Baking Hints
Here are links to posts about general baking hints that will help you with your baking from scratch ~ if you have a question about baking that you don't see answered here, please feel free to send me an email and I'll be happy to make every attempt to answer your question!
Baking Tips
About Herbs and Spices
Beef Cooking Tips
Listed here are the links to posts that should help you when cooking your grass-fed beef. If you have a question that you don't see answered here, please drop me an email and I'll be happy to make every attempt to help you!
The Most Important Thing To Remember!
Portion Sizes
Testing For Doneness
Pressure Cooking
Fridge and Freezer Storage Times
Successful Grilling Tips
PERFECT Grilling Hints
General Cooking Hints
Miscellaneous Helps
Beef Cooking Terminology
Grades of Beef and Their Meanings
Left-over Roast Beef Ideas
Ways to Stretch Sirloin Steak
Contact Information
If you would like to contact us about a recipe you'd like to see, a recipe you'd like to share, or if you have a question about our ranch ~ please use the following email link ~ we'd love to hear from you!