Minestrone with Sausage
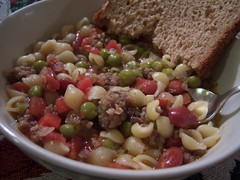
Minestrone Soup with Sausage
3 Tablespoons Olive Oil
1/2 - 1 pound of sausage (I used our own pork sausage)
1 onion, thinly sliced or diced
2 garlic cloves, minced
1 cup canned chopped or diced tomatoes
2 Tablespoons or more of fresh herbs, such as italian seasoning or parsley, sage, marjoram
1 small red or yellow bell pepper, diced
3-4 cups chicken stock
salt to taste
pepper to taste
1/2 to 1 cup macaroni noodles - your favorite shape
1/2 to 1 cup canned, drained great northern beans or pinto or kidney beans
1 can green peas, drained
Parmesan Cheese, freshly grated
French bread or cornbread for serving
Heat the oil in a large pan over medium-low heat. Add the sausage and onion and cook, stirring occasionally, until the onion is just colored.
Add the garlic, tomatoes and herbs - cook for about 5 minutes, stirring. Add the bell pepper, cover and cook 5 more minutes.
Pour in the chicken stock. Bring to a boil, then reduce the heat, cover and let simmer for 30 minutes or so.
Season to taste with salt and pepper. Add the macaroni noodles and beans and simmer for another 15 minutes or so, until the macaroni is just tender.
Stir in the peas and cook an additional 5 minutes.
Serve in bowls over french bread or cornbread if desired. Sprinkle with freshly grated parmesan cheese.
Enjoy!
Seafood In Mornay Sauce

There is a great "fish guy", Mr. Ed, who comes up to our area from the Gulf of Louisiana every couple of weeks from the summer through Christmas. He is here this week with everything super fresh - it is his last trip to town for awhile. My husband was in the area and picked up about 10-12 jumbo shrimp and about a half dozen or so large scallops. This is what I used for my recipe tonight.
You can make this with one seafood ingredient or as many as you desire. I've had it with a combination of lobster, shrimp, scallops and crab - just pick what you like and use it.
It goes together pretty fast, so have everything ready when you get started cooking.
First thing I do is put my rice on to simmer. Use whatever rice you like - a long grain white, an arborio, a basmati - whatever sounds good to you. Tonight I used an arborio rice.
For the 5 of us, I put one cup of rice to two cups of water, bring to a boil, then simmer slowly until the rice is soft and the water is gone. The only rule of thumb you need to remember for successful rice is water 2:1 over rice. Bring to a boil, then simmer SLOWLY, uncovered, until the rice is tender.
While the rice cooked, I cleaned my seafood. I quartered the scallops - not too small or they'll cook too quickly and get tough. I peeled, cleaned and de-veined the shrimp, then cut it into bite-size pieces.
I took a large saute pan and melted 1/2 cup of butter. When the butter is completely melted, put in the seafood and cook over medium-low heat for about 3 minutes. You don't want to overcook the seafood. Add a dash of salt. Remove the seafood from the pan and place in a bowl. Set seafood aside.
To the remaining butter in the pan, add 1/2 cup of flour and whisk for about 2 minutes to create a nice roux. You don't want it to get too brown, as the mornay sauce is a creamy white sauce. Once the roux is ready, add 1 cup of chicken stock and 1 cup of heavy cream. Add fresh black pepper to taste. Continue to whisk to keep any lumps from forming. The cream sauce will start to thicken. Continue to stir for about 5 minutes.
Your rice should be done by now - remove it from the heat. Turn the heat off under your cream sauce and add your seafood back into the cream sauce. Stir gently and add 1/2 cup freshly grated parmesan cheese.
Your seafood mornay is now ready to serve over the rice. Top with a little freshly grated parmesan. Be careful - it is very filling! We enjoyed ours tonight with freshly made cranberry-pineapple relish and a mixed sprout salad. Lovely and delicious!
Oh yes, after such a filling meal, we took the girls for a walk around the block to look at Christmas lights! Gotta do something to work off all that butter and cream!
Enjoy!
Recipe:
1/2 cup butter (1 stick)
1/2 cup flour
1 cup chicken stock
1 cup heavy cream
1/2 cup freshly grated parmesan cheese
salt to taste
fresh black pepper to taste
Your choice of seafood: shrimp, scallops, lobster, crab
Melt butter in a large saucepan. Lightly saute seafood over medium-low heat, remove from pan and set aside. Whisk flour into remaining butter over medium-low heat for about 2 minutes. Add chicken stock and heavy cream - continue to whisk to prevent lumps and cook until thickened, about 5 minutes. Add seafood back to cream sauce and add in the parmesan cheese. Stir, then serve immediately over rice. Top with additional freshly grated parmesan cheese if desired. Delicious with a simple salad on the side.
Moist Chocolate Cake
This is now my favorite chocolate cake recipe. I made this cake a couple of weeks ago for Papa's birthday with a peanut butter frosting and a week ago for my youngest daughter's birthday with chocolate frosting. It was exceptionally moist both times. I love chocolate and I'm picky about my chocolate cake - I don't like it to taste too bitter or too much like cocoa or too sweet - this one surprised me and is now at the very top of my list. So I'm sharing it!
Now, don't let the fact that it has no eggs scare you. Or the fact that it has vinegar in it. The vinegar and the baking soda react to make this cake super light. I'm telling you this cake is divine. And easy.
Moist Chocolate Cake (frosting recipes follow)
2 cups white sugar
3 cups all purpose flour
2 teaspoons baking soda
1/2 teaspoon salt
1/2 cup cocoa
2 cups water
1 cup vegetable oil
2 Tablespoons white distilled vinegar
1 teaspoon pure vanilla extract
Preheat oven to 350 degrees. Grease and flour a 9 x 13 inch pan or 2 square or 2 round cake pans.
Stir together the dry ingredients in a large mixing bowl. Mix together the wet ingredients, then add to the dry ingredients. Mix / blend until well blended.
Pour into prepared pans and bake a 9 x 13 for 40 minutes or until set in the middle.
Allow to cool on a cooling rack for 10 minutes before trying to remove cake from the pans.
Peanut Butter Frosting
I'm not a huge peanut butter fan. I'm about chocolate. But for Papa's birthday this past week, I knew he'd want something besides just chocolate cake. So I decided to liven his up and make it different with a homemade peanut butter frosting. My mom said it was the best frosting she'd had - she usually scrapes off any frosting, but loved this one.
1/2 cup butter - room temperature (1 stick)
2 cups confectioners sugar
1 cup creamy peanut butter (the frosting will be as good as the peanut butter you use)
1 teaspoon vanilla
2+ Tablespoons milk
Cream butter and peanut butter in a mixer until well blended. Gradually add confectioners sugar, vanilla and milk. Keep adding milk gradually until the frosting reaches the consistency that you desire - thick to spread or thin to drizzle.
Chocolate Frosting
1/4 - 1/2 cup butter - room temperature
2 cups confectioners sugar
3-4 Tablespoons chocolate cocoa powder
1 teaspoon vanilla
2+ Tablespoons milk
Cream butter in a mixer - gradually add confectioners sugar, cocoa, vanilla and milk. Use less cocoa for a light chocolate flavor - more for a heavier flavor. Keep adding milk gradually until the frosting reaches the consistency that you desire.
You can make a vanilla icing by using this same recipe and omitting the cocoa powder. For mine, I sometimes add a tiny splash (1/8 teaspoon) of orange or lemon extract to make it different.
Enjoy!
Pumpkin Bread Pudding
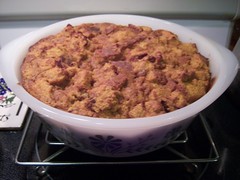
I adapted this recipe from one that I originally found in Gourmet magazine. Here's my version:
Pumpkin Bread Pudding
1/2 cup sugar
1/4 teaspoon salt
1/2 teaspoon cinnamon
1/4 teaspoon ground ginger
1/8 teaspoon ground allspice
1/8 teaspoon ground cloves
1 small can pumpkin puree (not pumpkin pie filling)
1-1/2 cups milk
3/4 cup melted butter
2 large eggs
5 cups cubed bread
Preheat oven to 350 degrees. Lightly grease a 8 inch square pan or similar 2-quart pan of your choice.
In a large bowl, combine the dry ingredients. Add the pumpkin, butter, milk and eggs. Mix well. Gently stir in the bread cubes just enough to coat, but not turn soupy. Pour into greased pan and cook on the middle rack of the oven for 40-45 minutes.
Serve warm with whipped cream or ice cream or serve room temperature.
Delicious!
Delicious and Easy Baked Snapper
Every couple of weeks during the summer there are two very nice men who come up from Louisiana with a divine selection of freshly caught fish and shellfish. About once a month or so, we purchase a few items and have never been disappointed.
This past week, we purchased large scallops, which my oldest daughter prepared after watching a YouTube video about preparing scallops by Chef Gordon Ramsey. She sauted them in a hot skillet with olive oil, freshly minced garlic, fresh thyme and some butter. We served them with pasta and they were very tasty. Unfortunately I don't have any pictures of her cooking adventure to share this time, but I'll be sure to catch some next time.
The next evening we had baked snapper - it was easy and delicious. Here's how I prepared it.
In a 9x13 baking dish, I put a little olive oil in the bottom of the dish. On top I place a nice sized sheet of parchment paper.
After rinsing the snapper filet, I placed it on the parchment paper. I drizzled it with a little olive oil, then added a sprinkling of salt, pepper and herbs de provence. I topped it off with slices of fresh lemon. Then I wrapped the parchment and tucked it under the fish filet. I put about a 1/4 cup of water in the pan around the parchment and baked the filet in a preheated 350 degree oven. 
Our filet took about 20 minutes to cook due to thickness. Delicious!
Salmon Surprise
My oldest daughter brought a recipe home from the grocery store the other day after trying a sample of the final product. We gave it a try and enjoyed it, so I'm sharing it here.
Salmon Surprise
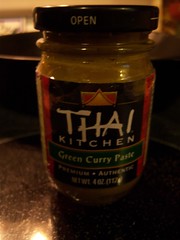
1/2 pound Thai Rice Noodles, cooked
1 1/2 Tablespoons oil (I used a mixture of olive oil and coconut oil)
1 Tablespoon Thai Green Curry Paste
1 cup chopped onions
1/2 - 1 cup chopped green or red or yellow peppers
1-2 Tablespoons fish sauce (I didn't have this, so I left it out)
1 Tablespoon dried basil (I used Pesto Sauce instead)
1 large can salmon (I used one with no artificial color)
1/2 cup Parmesan cheese
1-1/2 shredded cheese of your choice (I used Sargento 4 Cheese Mexican Blend)
Cook the Thai Rice Noodles until al dente. Drain and set aside. 
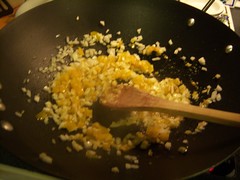
Heat oil in a skillet over medium heat. Stir in the curry paste, onions, peppers and basil. Cook until onions and peppers are tender. 
Mix in the salmon and cook until it is heated through - this just takes a couple of minutes. Stir in the parmesan cheese. Add the rice noodes and fish sauce. Stir to mix, then plate. 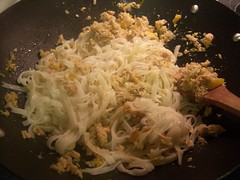
Top with shredded cheese - I used the 4 cheese Mexican blend by Sargento. Serve while hot.
Mozzarella Meatballs
Nothing too fancy or too hard, but my girls love it when I make big meatballs like this and love it even more when they are filled will lots of yummy mozzarella cheese! Here's how I do it:
1-2 pounds of M4-D Ranch Pastured Ground Beef
Several 1/2 inch to 1 inch cubes of organic mozzarella cheese
salt - to taste
pepper - to taste
garlic pepper - to taste
any other seasoning you love - to taste
shredded cheese for topping at the end
For your first meatball, take about a 1/4 pound of ground beef (4 ounces) just like you would to make a hamburger patty. Instead of making a patty, I place a cube of mozzarella cheese in the middle and form the ground beef into a large meatball around the cheese. Now, if you make your own mozzarella, that's even better, but not something I've gotten around to doing quite yet.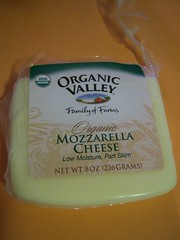
Set meatball aside. Continue making meatballs like this until you've made as many as you'd like. 1 pound of ground beef should make 4 large meatballs; 2 pounds will make about 8. Sprinkle with whatever seasonings make your tastebuds tingle - I normally use salt, pepper and garlic powder as staples on my burgers.
Heat a skillet with a little olive oil. Now, our pastured ground beef is very lean and hardly ever has any extra grease - if anything I always have to add oil when cooking. So, I heat my skillet with a little olive oil and when it is heated I place the meatballs in to brown. 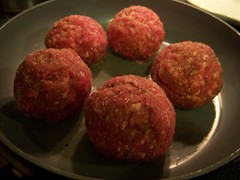
Brown them lightly on one side, then turn and brown them on the other side.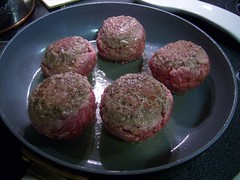
Next, add about 1/4 cup or so of water to the pan and put on a lid. Turn the heat down to medium or medium-low and allow the meatballs to steam until done. This is the key for having moist, juicy meatballs instead of hard, dried-out ones. Steam. Moist cooking. 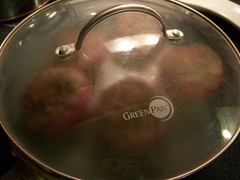
When they are done to your liking (we like ours around medium), remove to a plate and sprinkle the tops with shredded cheese - any favorite will work just fine. This cheese will melt and you'll have delicious melted cheese inside and out. Yum.
Enjoy!
Easy Apple Cobbler
1 can biscuits
1 gallon of sliced apples - firm, tart apples work best
1 stick of butter
1-2 cups of sugar - use to your discretion depending on the sweetness desired
2-3 Tablespoons cornstarch
Cinnamon to taste
Nutmeg to taste
1/4 - 1/2 cup water
Okay, when I am pressed for time, I cheat and use biscuits for my cobbler dough. I prefer to make my dough homemade, but sometimes you just gotta use a shortcut!
Grease the bottom and sides of a 9x13 inch pan with butter. On a floured surface, take a biscuit and roll it out very thin. Place on the bottom of the 9x13 inch pan. Continue with about 1/2 the can of biscuits or until the bottom of the pan is covered with dough. Don't worry if the dough overlaps some.
Place the gallon of sliced apples on top of the dough. In a bowl mix the sugar and cornstarch. Sprinkle over the apples. Sprinkle with cinnamon and nutmeg to taste. I like both and probably use about 1-2 Tablespoons of cinnamon and about a teaspoon or two of nutmeg. Slice 1/2 a stick of butter and place the slices on the apples.

Bake in a 350 degree oven for 45 minutes to 1 hour - cobbler will be bubbling and crust on top will be very browned and crispy when done. Top with vanilla ice cream or whipped cream or both! Delicious!

Vegetable Beef Burgers
One of our new customers shared this recipe with me recently and I thought I'd pass it along! Enjoy!
Vegetable Beef Burgers
A twist on the family favorite. Serve with Lettuce, tomato and avocado.
2 pounds M4-D Ranch Ground Beef
1 small very firm tomato, finely chopped
1 medium onion, chopped
1 small green pepper, finely chopped
1/2 tsp salt
1/2 tsp black pepper
1/2 tsp garlic powder
1 1/2 tsp Worcestershire sauce
Mix gently together and form patties. Grill or pan fry in a little olive oil. If pan frying, sear and then reducing heat to cook.
You can also top with Provolone cheese and leave off the buns - we did and it was amazing!
Happy Cows = Healthy Cows!
This morning had a pretty neat start to the day. As a result of the Memphis Flyer article a couple of weeks ago about our natural beef, one of our local area news stations, Channel 3, contacted me late last week to see if I would appear this morning on their Live at 9 show to talk more about our philosophy on raising "happy, healthy cows"!
It was a fun morning, very relaxed and I thoroughly enjoyed it. The girls got a kick out of seeing their mom on TV and I got to spend a few minutes talking about the reasons why we think our grass-fed beef is the way to go.
If you want to watch for yourself - just click on the link below and select the June 2nd video - about 34 or so minutes in - right after the band finishes up.
"Do Happy Cows Make For Healthier Cows?"
5 Seconds of Fame
We had a delightful reporter for one of our area's free weekly magazines come out to do a story on our ranch and our pastured beef a couple of weeks ago. The article published today - and we're so very pleased with how well it was written to capture our intent for raising our beef. Here's a link to our 5 seconds of fame:
Who's For Dinner? - by Bo List of the Memphis Flyer Magazine
Thanks Bo!
Lemon Tea Cake
Just in time for the weekend and next week's holiday celebrations, how about a delicious, southern, summer cake? Guaranteed to tingle your tastebuds - ya'll will love it! Here we go! Remember to read through the whole recipe before you get started, so you'll know all the steps.
Lemon Tea Cake
2 cups all purpose flour
1/2 teaspoon cream of tartar
1/4 teaspoon baking soda
1/4 teaspoon salt
1 cup unsalted butter, room temperature
1 1/2 cups sugar
5 eggs, room temperature
1 teaspoon lemon extract
1 Tablespoon finely grated lemon zest
1/2 cup freshly squeezed lemon juice
1/2 cup steeped lemon tea
1 cup sugar
Powdered sugar for dusting, if desired
Preheat oven to 325 degrees. Grease a 6-8 cup pan. I use a Bundt pan. Sift together the flour, cream of tartar, baking soda and salt. Set aside.
With mixer on medium speed, cream butter and 1 1/2 cups sugar until light and fluffy. Remember, this takes time, as the objective is to coat every single bit of sugar with butter. Add eggs, one at a time, beating well after each addition. Add lemon extract and lemon zest. Gradually beat in dry ingredients just until the batter is evenly mixed. Overbeating = rubbery cake. Pour into prepared pan and bake one hour or until a toothpick or cake tester inserted in the center comes out clean. Let cake cook in the pan for 10 minutes on a wire cooling rack.
While cake is baking, make syrup by combining the lemon juice, lemon tea and 1 cup of sugar in a small saucepan. Bring this to a boil and cook until the syrup thickens. You are not looking for molasses, just thick like maple syrup. This will take 5 minutes or so. Remove pan from heat and let syrup cool completely.
Pierce the flat side of the cake all over to help it absorb the syrup. Chopsticks work well for this task. Slowly pour syrup over the cake, allowing it to absorb completely. Let cake cool in the pan 10 minutes more. Transfer to a serving platter and allow it to cool completely. Dust cake with powdered sugar if desired and serve.
Serves 12.
Enjoy!
Recipe from Pick TN Products Recipe Booklet
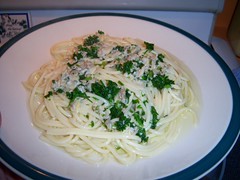
Pasta with Clam Sauce
I made this for dinner last night as my whole family loves it. It is really easy and quick to make, has a light and delicate taste and seems to hit the spot on a warm evening. I made enough to serve 6, so if you need to you can increase or decrease the quantity to fit your needs.
Pasta with Clam Sauce
Spaghetti Noodles
2 Tablespoons Olive Oil
2 Tablespoons Butter
2 Tablespoons Minced Garlic
1 large can clams with liquid
1/2 bunch of Parsley, minced well
Fresh Parmesan Cheese for topping
Salt and Pepper to Taste
The first step is to put your water on to boil and then get your pasta started. I used regular spaghetti noodles. Be sure to add salt to your water with your spaghetti.
The sauce is very quick to make, so you don't want to get it started until about 5 minutes before you are ready to drain and plate your pasta. Your first step is to mince your parsley and set it aside.
In a skillet, add the olive oil and butter. Over medium heat, stir until butter begins to melt.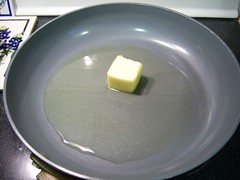
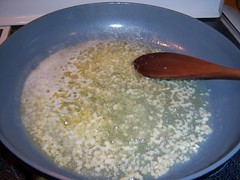
Add the minced garlic and cook gently until it is a light golden brown.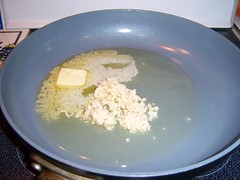
Add the entire can of clams with the liquid and bring to a gentle boil.
Note: You could easily use 2 cans of clams so you'll have plenty of sauce, but I only had one can on hand last night and it was just enough for 6 servings. Also, I make certain not to buy any canned clams from China. You can find cans from the US or Thailand - those are the ones I usually use.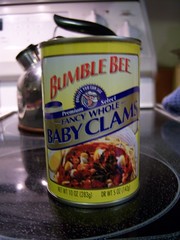
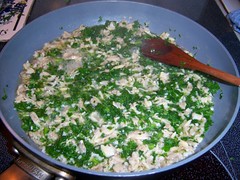
The clams will cook very quickly and if you cook them too long will become tough. It only needs a couple of minutes. Just before removing the sauce from the heat, stir in the chopped parsley.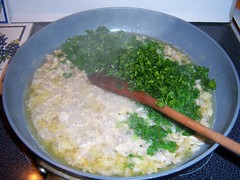
To plate, I put a healthy Tablespoon or so of olive oil on the plate or bowl. I then plate the pasta and add the sauce on top. On top I put a very healthy serving of freshly grated parmesan cheese just before serving.
This is delicious and really doesn't need anything with it except perhaps a fresh garden salad and a nice glass of wine or sweet tea.
Enjoy!
Easy Beef Brisket
I enjoy beef brisket. We have many beef customers though who aren't sure how to cook it. Typically, beef brisket is a very large cut of beef that does well with low, slow cooking. It is also good cooked all day in a smoker. Mmmm, I can smell that delicious scent now!
Here's how I like to cook mine in the oven.
In a large, deep roasting pan, lightly coat the bottom and sides with olive oil or your favorite no-stick spray. Place the beef brisket into the pan, fat side up. Rub on your favorite selection of herbs. I usually use salt, pepper, italian seasoning, and minced garlic - sometimes some rosemary or adobo seasoning or something with a little zip.
I then pour and entire large can of tomato juice into the pan. I surround the brisket with carrot chunks, potato chunks, onion chuncks and celery (if I have any on hand, which I rarely do).
Cover the dish with parchment paper, then aluminum foil. You use the parchment paper to keep the tomato juice from touching the foil and interacting to make everything have a very metallic taste. Trust me on this one. Use the parchment paper first. The foil will act as a lid to help steam the beef.
Place in a preheated 300-350 degree oven and bake for 1-3 hours, depending on how large the brisket is. I like mine to cook to a medium degree of doneness, which still has plenty of pink in the middle. Remove from the oven, allow to set for 10-15 minutes, then carve for serving.
I often serve this with a sauteed vegetable medley of cabbage, onions and peppers or with a nice large bowl of salad greens and a big glass of sweet tea for drinks.
If you have a great recipe for cooking brisket, I'd love to hear it!
Sausage Gravy and Homemade Biscuits
Not something I make for everyday breakfast, but it sure hits the spot on a weekend when the day is going to be full of activities and we all need something substantial to get us going! Here's how I make mine.
Homemade Drop Biscuits
The key to good biscuits is having the cold ingredients really cold and not handling the dough too much. This is why I usually make drop biscuits instead of rolling mine out. The longer the butter stays cold in the dough before you put it in the oven to bake, the flakier your biscuits will be. Too much handling means tough biscuits!
2 cups unbleached all-purpose flour
2 1/2 teaspoons baking powder
1/4 teaspoon baking soda
dash salt
1/4 cup butter or shortening
3/4 to 1 cup of kefir milk or buttermilk or regular milk
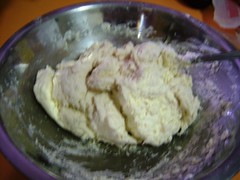
In a large bowl mix the dry ingredients together or sift them together. Cut butter into small chunks and incorporate into the dry ingredients with a pastry knife until the butter is smaller than a pea, but not as fine as cornmeal. Add your liquid and stir until the dough is still a little firm, but will drop from a Tablespoon.
Drop the dough by large Tablespoonfuls onto a greased cookie sheet and bake in a preheated 425 degree oven until browned to your liking. I bake mine 15-20 minutes, because I like mine crispy on the bottoms.
While the biscuits are baking, I make the sausage gravy~
Sausage Gravy
1 pound sausage ~ I use our M4-D Ranch Beef Sausage
2-3 Tablespoons flour
1-1 1/2 cups milk
salt to taste
pepper to taste
I brown my sausage in a large cast iron skillet until done. Remove sausage from the skillet and set aside. With our sausage, it cooks very lean, so there is usually not a whole lot of grease left in the pan. But you need some grease to mix in with the sausage crumblings left in the skillet to make the roux for your gravy base. So, with our sausage, I usually have to add about a Tablespoon of bacon grease in order to have enough. You need about 1-2 Tablespoons of drippings from cooking the sausage to make a skillet full of gravy.
I add about 1 1/2 times the amount of flour to the pan that I have in drippings - I want a dryish "paste" to brown for my gravy base - this is called the roux. For the photos below, I added about 2-3 Tablespoons of flour. Just add your flour in a little at a time until and incorporate into the the drippings until you have a fairly thick consistency.
Brown the roux. The darker you brown your roux, the darker your gravy will be after you add your milk. I like my gravy pretty browned, so I cook it until the roux is very dark. There are no rules - just make it the color you want it and remember that when you add the milk it will lighten.
Once your roux is the desired color, add your milk all at one time. Whisk well to prevent lumps over medium heat. Continue to whisk and cook at boiling to allow the gravy to thicken. Cook until it is the thickness you desire, again there are no hard rules to follow. Make your gravy as thick as you want. If you added a little too much milk, it will thicken, but might take a little longer cooking time. Don't forget to add your salt and pepper to taste.
Once your gravy is the thickness you desire, add the sausage back in and heat it well.
Next, plate your biscuits, cut them open and spoon the gravy over the top - YUM!
When I was growing up, we'd have this kind of "milk gravy" just about any time my mom made a meal with fried meat ~ fried chicken, fried pork chops, country fried steak - it was good! The steps are always the same - cook your meat, leave some drippings, add flour and brown to make a roux, stir in your milk and heat until thick. A southern staple!
Here are the steps in photos - first for the biscuits, then for the gravy:
Dry ingredients for the biscuits
Butter and pastry knife
Notice the dough has some "stickiness" too it. Not firm enough to roll out, but not thin enough to run off the spoon.
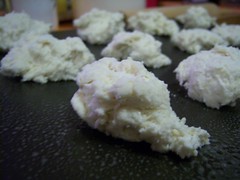
Biscuits going into the oven
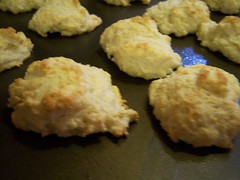
Biscuits out of the oven

Beef sausage in cast iron pan

Sausage as it is browning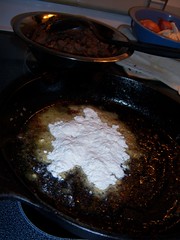
Flour added to drippings to form the roux.
Roux is browning over medium heat.

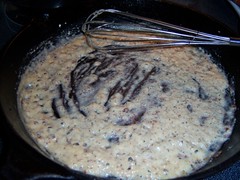
Milk added to the browned roux.
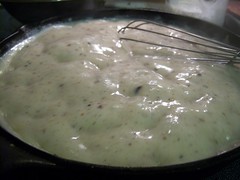
Bringing the mixture to a full boil to thicken.
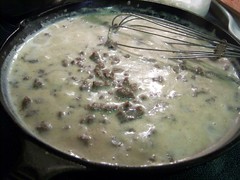
When thick, the sausage is added back in and heated.
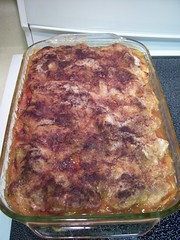
Easy and Tasty Beef Lasagna
For quite awhile, I've avoided making lasagna even though I love it, because most recipes call for cheese and sausage ingredients that I just don't usually have on hand.
So, this weekend I had some time one night and decided to browse lasagna recipes again. I found a few that were made with very simple ingredients and decided to alter them using what ingredients I already had on hand in my pantry or refrigerator.
Now, if you are a believer that lasagna just isn't "real" unless it has ricotta cheese and italian sausage and other exotic ingredients, then you might want to pass this recipe on by. But, if you like lasagna and are looking for a quick and easy recipe that is very tasty, you might want to give this one a try.
It whips together very quickly and can be baked right away, can be put in the refrigerator to bake later or even frozen. And it makes a large lasagna pan FULL. If you have a small family, you'll probably want to cut this recipe in half or plan to freeze half for another meal.
Ready?
Here we go.
~~~~Easy and Tasty Lasagna~~~~
~~For the Beef Sauce Layer~~
1.5 pounds of ground beef
1 pound of sausage
2 cloves of garlic, diced
2 large cans whole tomatoes or diced tomatoes
2 small cans tomato paste
2 Tablespoons Italian Seasoning
1 teaspoon salt
I used our grass-fed ground beef and grass-fed beef sausage for this recipe. It cooks up nicely and is lean enough that I don't have to drain off any fat. I cooked both in a large skillet with the garlic until the beef and sausage was brown and crumbly. If you use conventional beef from the grocery, you'll need to drain off about half the fat when it is done.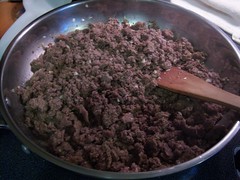
Next, add in two large cans of tomatoes. I used organic tuscan tomatoes shown in the picture below, because I've already used my supply of canned and frozen tomatoes from last year and it is what I had on hand. So, use whole tomatoes, diced tomatoes, stewed tomatoes, whatever you have on hand.
Next add in 2 cans of tomato paste, the salt and the italian seasoning.
Mix together well and allow to come to a boil in the skillet. Remove from heat and set aside.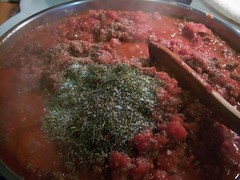
~~For the Cheese Sauce Layer~~
2 cups cottage cheese
1 cup kefir cheese
2 beaten eggs
1/2 cup shredded 4 cheese mexican blend
1 teaspoon italian seasoning
1 teaspoon salt
You could use 3 cups of cottage cheese, but I didn't have that much on hand and I always have kefir cheese that I've made in the fridge, so I made a substitution. Also, instead of the mexican shredded cheese blend, you could use 1/2 cup of parmesan cheese. We never buy the pre-shredded parmesan cheese, only the blocks of fresh parmesan and I wanted to save it for the topping.
In a large bowl combine the cottage cheese, kefir cheese, eggs, shredded cheese, italian seasoning and salt. Set aside.
~~Putting it all together~~
1 box of lasagna noodles
1 large lasagna pan
butter or no-stick spray
mozzarella cheese - whole slices or shredded and/or more of the shredded 4 cheese mexican blend.
Butter or spray the sides and bottom of a large lasagna pan. Place a solid layer of the lasagna noodles on the bottom. I didn't pre-cook mine and my recipe turned out just lovely. So don't worry, give it a try without cooking the noodles first.
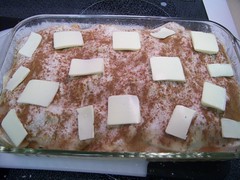
Next, place a nice layer of the cheese sauce on top of the noodles. On top of the cheese sauce, add a nice layer of mozzarella cheese and/or the mexican cheese blend, whatever you have on hand. Top that with about 1/2 of the meat sauce mixture.
Add another layer of lasagna noodles, the rest of the cheese sauce, another layer of mozzarella or shredded cheese and the rest of the beef sauce. Top with a healthy layer of shredded mozzarella if you have it. I used shredded fresh parmesan cheese.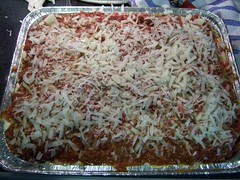
Now you are ready to bake it at 350 degrees for about 30 minutes, until it is bubbling and the cheese is nicely melted and browned on top.
I made mine early in the day and put it in the refrigerator until dinner time. I baked mine for about 45 minutes.
You could also freeze it for a later date.
I've tried to give detailed instructions here, but this is very easy to make and it went together for me really quickly, especially since I didn't pre-cook the lasagna noodles. So please don't be intimidated by the length of this post and think that it will take forever to put this together.
Let me know how this recipe works if you try it ~ especially if you alter it and can share a new way to make it that worked for you!
Enjoy!
Baking Tips
I love to cook and bake for my family. Desserts are my favorite and I thought I'd pass along some baking tips that I've learned over the years that help make my scratch cooking all the better.
1. Always use an oven thermometer. Most baking failures are due to faulty oven temperatures. How do you know your oven is ~really~ at 350 degrees unless you have an oven thermometer? Be sure to get one and leave it in there!
2. For lighter, fluffier made from scratch cakes ~ the key is to have all ingredients at room temperature.
3. The purpose of creaming butter when making a cake from scratch is to get air into the butter. This takes time. Don't rush it.
4. When you incorporate sugar into your creamed butter, the goal is to coat every single sugar granule with butter. Again, this takes time. Don't rush it.
5. When adding eggs to your cake batter, add them only one at a time and allow them to mix well.
6. Break eggs into a separate bowl first - it makes it much easier to get out any small shell fragments if necessary. And, if you use farm fresh eggs like we do, on the slight chance you gathered one that is a little old, you won't ruin your whole recipe!
7. Cakes that are too high when baked are that way because your oven was too hot.
8. Cakes that are sunken when baked are that way because your oven was too cool - or- You Peeked Too Much (that's why most ovens have a door with a window and a light - be sure to peek there instead of opening the door! ;-)
9. Always start out with the lowest baking time and increase only if needed.
10. Cooling racks are an essential in my book and should be sturdy. If you cool a cake directly on the stovetop or countertop you'll end up with a soggy cake bottom.
11. Cake testers are wonderful little devices. You can also use wooden skewers, which are longer than toothpicks and won't get lost in your cake!
12. Be sure to use proper utensils for measuring wet versus dry ingredients. Glass measuring cups with graduated measurements are for Liquids. Measuring cups designated as 1 cup, 1/2 cup, 1/3 cup, 1/4 cup that we're familiar with are for Dry ingredients.
13. Use a pastry cloth for working dough instead of the countertop or cutting board or waxed paper. A pastry cloth is designed to hold flour and keep your dough from sticking without incorporating any extra flour into your dough. If you just use the countertop or other surface, the flour you put there will eventually work into your dough and could make it tough or rubbery. I LOVE my pastry cloth!
Basic Bread Pudding
I experimented a couple of months ago with Bread Pudding, which my family has decided that they really enjoy. Here's how I've made mine through bits and pieces of different recipes:
Bread Pudding
4-5 cups bread cubes
2-3 cups scalded milk
1/4 cup melted butter
1/2 cup sugar
2 eggs, beaten
1/4 teaspoon salt
1 teaspoon grated nutmeg
1 teaspoon cinnamon
1 teaspoon vanilla
1/2 to 1 cup of raisins or dried cranberries or blueberries and/or walnuts to your preference
Lemon Sauce:
1/2 cup sugar
1 Tablespoon cornstarch or arrowroot powder
1 cup hot water
2 Tablespoons butter
3 Tablespoons fresh lemon juice
2 Tablespoons fresh lemon zest
Preheat oven to 350 degrees. Lightly grease a 1-2 quart baking dish.
In a large bowl, place bread cubes. Heat milk until steam starts to rise from the pan, but do not boil. Pour scalded milk over bread cubes.
In a separate bowl blend all other ingredients. Add to bread cubes and milk and lightly combine. You don't want the bread to turn to mush.
Pour into baking dish and bake for 40-45 minutes or until a knife inserted in the center comes out clean.
You can bake in a steam bath if you prefer - I've baked mine this week with and without a steam bath and it turned out fine both ways.
Before serving, make the sauce:
Put all ingredients into a saucepan and heat until thick and bubbling. Pour or spoon over individual servings of bread pudding.
Baked Pumpkin Pudding
After dinner one night I was in the mood for dessert, something a little sweet but not too much. Something like a custard or pudding ~ but I was out of milk! So, I searched Allrecipes.com for a custard to make with evaporated milk. I found one for Baked Pumpkin Pudding that I altered. Here's how I made it:
Baked Pumpkin Pudding
1 egg
2 cups canned pumpkin
1/2 cup sugar
1 Tablespoon honey
1 teaspoon ground cinnamon
1/2 teaspoon ground ginger
1/4 teaspoon ground nutmeg
1 1/2 cups evaporated milk
Preheat oven to 425 degrees.
Beat all ingredients in a bowl until well blended. Lightly coat 5-6 ramekins with no-stick spray. Evenly pour pumpkin mixture into ramekins. Line the bottom of a 9 x 13 or larger baking pan with a dishtowel. Place ramekins on the towel and fill pan to 1/2 way up ramekins with boiling water.
Place in oven and bake at 425 degrees for 10 minutes. Reduce heat to 350 degrees and bake for 30-35 minutes longer or until set in the middle.
Cranberry Orange Bread Pudding
A few days ago, after dinner we were all in the mood for a warm, filling dessert. Cranberry Orange Bread Pudding is what I made - here's the recipe:
About 4 cups or so of crumbled bread (in large pieces)
2 cups scalded milk
2 eggs
1/2 cup sugar
1/2 teaspoon grated nutmeg
1/2 cup dried cranberries
Zest of a whole orange
Dash of vanilla
Preheat oven to 350 degrees. Grease a 1 1/2 to 2 quart casserole dish and set aside.
In a large bowl, crumble the bread (I used whole wheat). Sprinkle in the dried cranberries and set aside.
Heat milk to scalding (just when steam starts to rise off the milk) and pour over the bread and cranberries. Stir just enough to combine. Set aside.
In another bowl, mix the eggs, sugar, nutmeg, vanilla and orange zest. Pour into bread mixture and stir to combine.
Pour mixture into greased casserole dish and bake at 350 degrees for 40-50 minutes or until a knife inserted in the middle comes out clean. Serve warm. Refrigerate leftovers.
I didn't make a topping or glaze for this one, as it was just wonderful with the cranberry and orange flavor.
Handmade Wheat Bread
Our family loves homemade bread. Long ago I used to make mine a loaf at a time, when I had the time, in a bread machine. Once I tried making bread by hand though, I was hooked! I now make bread 2-3 times a week and make about 3 loaves at a time. It really doesn't take that long once you get the hang of it. Here's our favorite recipe for Wheat Bread.
I mix my recipe around a bit, depending on what I have on hand. If I'm running low on grains, sometimes I'll make this as a white bread recipe. I usually make it with white and wheat flour at least and sometimes I'll also add spelt or kamut to the recipe to make a multigrain bread. Here's my basic recipe:
Handmade Wheat Bread
6 cups unbleached flour*
2 Tablespoons wheat gluten
1.5 teaspoons salt
2 cups water at approximately 105-110 degrees**
1/3 cup sugar
2 Tablespoons yeast
1/4 cup oil
* For the flour, I usually break it down to 3.5 cups of King Arthur Special with malted grains. It is an unbleached flour that makes wonderful bread. To this I add 2.5 cups of whatever grain I want to grind myself that day - usually wheat, but sometimes spelt or kamut. Sometimes I use a combination of any two or even all three different grains. The dough will rise best with at least 3.5 cups of the flour being the King Arthur or whatever your favorite unbleached flour is to use. You'll notice I add wheat gluten to help the dough rise when I use the wheat or spelt or kamut.
**For the water, I use 1 cup of water at the desired temperature and 1 cup of kefir whey.
In a 4 cup mixing bowl, combine the water, yeast and sugar and mix well. Allow to set approximately 10-15 minutes to activate the yeast.
In a large mixing bowl, combine the flour(s), salt, and wheat gluten. To the activated yeast mixture, add 1/4 cup of oil (I use organic canola oil or a light olive oil or sometimes a vegetable oil) and mix well. Stir into the flour mixture until well combined and then turn out the dough onto a well floured surface.
Knead the dough well by adding additional flour, about 1/4 cup at a time, until the dough becomes a soft, silky ball. This usually takes about 10 minutes or so.
Place the dough into a lightly greased bowl and cover with a smooth cotton towel. Place in a warm place until the dough doubles in size. I put mine in my oven with the light on for about 2-3 hours.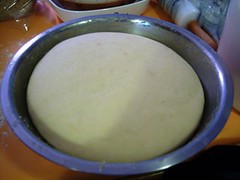
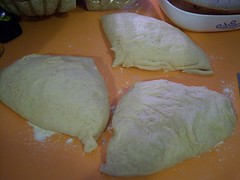
Once the dough has doubled in size, turn it out onto a lightly floured surface, punch down and divide into half or thirds. If my dough has really risen well, I'll divide it into thirds and make 3 loaves. If it is not rising as well as I'd like, I divide it into half and make 2 loaves. Every day is different when you make bread - humidity, temperature, your flour, all play a part in how your bread turns out. Some days it will rise better than others.
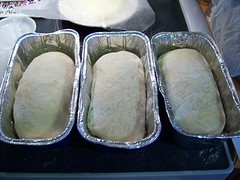
Okay, here I don't knead the dough again, I just turn the corners and shape it into a nice little loaf. Put the loaves into lightly greased loaf pans and cover. Allow to rise until the dough is about 1/2 inch above the top of the pan.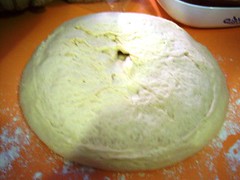

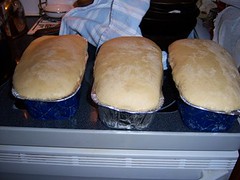
Heat your oven to 350 degrees and put the loaves in the oven. Bake for 30 minutes. They will be nicely browned. Turn out immediately onto a wire rack to cool so the bread doesn't get soggy. Wait until they are completely cooled before wrapping. I keep mine wrapped in foil so they don't dry out too quickly. Usually, we can go through at least 1 loaf a day, so they don't last too long anyway!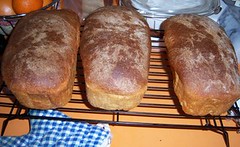
If you try this recipe - let me know how it turns out, especially if you make any changes or additions I might like to try with mine!