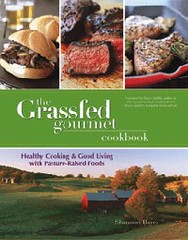
Happy Cows = Healthy Cows!
This morning had a pretty neat start to the day. As a result of the Memphis Flyer article a couple of weeks ago about our natural beef, one of our local area news stations, Channel 3, contacted me late last week to see if I would appear this morning on their Live at 9 show to talk more about our philosophy on raising "happy, healthy cows"!
It was a fun morning, very relaxed and I thoroughly enjoyed it. The girls got a kick out of seeing their mom on TV and I got to spend a few minutes talking about the reasons why we think our grass-fed beef is the way to go.
If you want to watch for yourself - just click on the link below and select the June 2nd video - about 34 or so minutes in - right after the band finishes up.
"Do Happy Cows Make For Healthier Cows?"
5 Seconds of Fame
We had a delightful reporter for one of our area's free weekly magazines come out to do a story on our ranch and our pastured beef a couple of weeks ago. The article published today - and we're so very pleased with how well it was written to capture our intent for raising our beef. Here's a link to our 5 seconds of fame:
Who's For Dinner? - by Bo List of the Memphis Flyer Magazine
Thanks Bo!
Lemon Tea Cake
Just in time for the weekend and next week's holiday celebrations, how about a delicious, southern, summer cake? Guaranteed to tingle your tastebuds - ya'll will love it! Here we go! Remember to read through the whole recipe before you get started, so you'll know all the steps.
Lemon Tea Cake
2 cups all purpose flour
1/2 teaspoon cream of tartar
1/4 teaspoon baking soda
1/4 teaspoon salt
1 cup unsalted butter, room temperature
1 1/2 cups sugar
5 eggs, room temperature
1 teaspoon lemon extract
1 Tablespoon finely grated lemon zest
1/2 cup freshly squeezed lemon juice
1/2 cup steeped lemon tea
1 cup sugar
Powdered sugar for dusting, if desired
Preheat oven to 325 degrees. Grease a 6-8 cup pan. I use a Bundt pan. Sift together the flour, cream of tartar, baking soda and salt. Set aside.
With mixer on medium speed, cream butter and 1 1/2 cups sugar until light and fluffy. Remember, this takes time, as the objective is to coat every single bit of sugar with butter. Add eggs, one at a time, beating well after each addition. Add lemon extract and lemon zest. Gradually beat in dry ingredients just until the batter is evenly mixed. Overbeating = rubbery cake. Pour into prepared pan and bake one hour or until a toothpick or cake tester inserted in the center comes out clean. Let cake cook in the pan for 10 minutes on a wire cooling rack.
While cake is baking, make syrup by combining the lemon juice, lemon tea and 1 cup of sugar in a small saucepan. Bring this to a boil and cook until the syrup thickens. You are not looking for molasses, just thick like maple syrup. This will take 5 minutes or so. Remove pan from heat and let syrup cool completely.
Pierce the flat side of the cake all over to help it absorb the syrup. Chopsticks work well for this task. Slowly pour syrup over the cake, allowing it to absorb completely. Let cake cool in the pan 10 minutes more. Transfer to a serving platter and allow it to cool completely. Dust cake with powdered sugar if desired and serve.
Serves 12.
Enjoy!
Recipe from Pick TN Products Recipe Booklet
Pasta with Clam Sauce
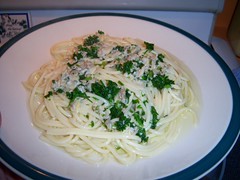
I made this for dinner last night as my whole family loves it. It is really easy and quick to make, has a light and delicate taste and seems to hit the spot on a warm evening. I made enough to serve 6, so if you need to you can increase or decrease the quantity to fit your needs.
Pasta with Clam Sauce
Spaghetti Noodles
2 Tablespoons Olive Oil
2 Tablespoons Butter
2 Tablespoons Minced Garlic
1 large can clams with liquid
1/2 bunch of Parsley, minced well
Fresh Parmesan Cheese for topping
Salt and Pepper to Taste
The first step is to put your water on to boil and then get your pasta started. I used regular spaghetti noodles. Be sure to add salt to your water with your spaghetti.
The sauce is very quick to make, so you don't want to get it started until about 5 minutes before you are ready to drain and plate your pasta. Your first step is to mince your parsley and set it aside.
In a skillet, add the olive oil and butter. Over medium heat, stir until butter begins to melt.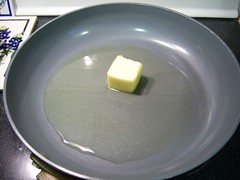
Add the minced garlic and cook gently until it is a light golden brown.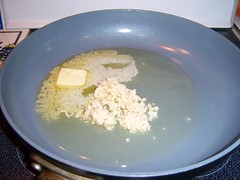
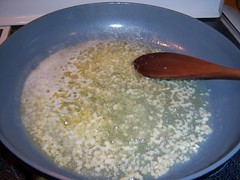
Add the entire can of clams with the liquid and bring to a gentle boil.
Note: You could easily use 2 cans of clams so you'll have plenty of sauce, but I only had one can on hand last night and it was just enough for 6 servings. Also, I make certain not to buy any canned clams from China. You can find cans from the US or Thailand - those are the ones I usually use.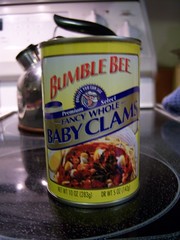
The clams will cook very quickly and if you cook them too long will become tough. It only needs a couple of minutes. Just before removing the sauce from the heat, stir in the chopped parsley.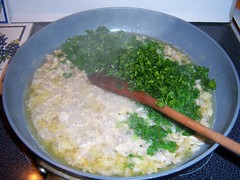
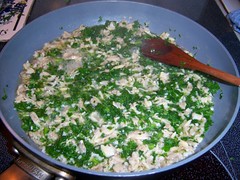
To plate, I put a healthy Tablespoon or so of olive oil on the plate or bowl. I then plate the pasta and add the sauce on top. On top I put a very healthy serving of freshly grated parmesan cheese just before serving.
This is delicious and really doesn't need anything with it except perhaps a fresh garden salad and a nice glass of wine or sweet tea.
Enjoy!
Easy Beef Brisket
I enjoy beef brisket. We have many beef customers though who aren't sure how to cook it. Typically, beef brisket is a very large cut of beef that does well with low, slow cooking. It is also good cooked all day in a smoker. Mmmm, I can smell that delicious scent now!
Here's how I like to cook mine in the oven.
In a large, deep roasting pan, lightly coat the bottom and sides with olive oil or your favorite no-stick spray. Place the beef brisket into the pan, fat side up. Rub on your favorite selection of herbs. I usually use salt, pepper, italian seasoning, and minced garlic - sometimes some rosemary or adobo seasoning or something with a little zip.
I then pour and entire large can of tomato juice into the pan. I surround the brisket with carrot chunks, potato chunks, onion chuncks and celery (if I have any on hand, which I rarely do).
Cover the dish with parchment paper, then aluminum foil. You use the parchment paper to keep the tomato juice from touching the foil and interacting to make everything have a very metallic taste. Trust me on this one. Use the parchment paper first. The foil will act as a lid to help steam the beef.
Place in a preheated 300-350 degree oven and bake for 1-3 hours, depending on how large the brisket is. I like mine to cook to a medium degree of doneness, which still has plenty of pink in the middle. Remove from the oven, allow to set for 10-15 minutes, then carve for serving.
I often serve this with a sauteed vegetable medley of cabbage, onions and peppers or with a nice large bowl of salad greens and a big glass of sweet tea for drinks.
If you have a great recipe for cooking brisket, I'd love to hear it!
Sausage Gravy and Homemade Biscuits
Not something I make for everyday breakfast, but it sure hits the spot on a weekend when the day is going to be full of activities and we all need something substantial to get us going! Here's how I make mine.
Homemade Drop Biscuits
The key to good biscuits is having the cold ingredients really cold and not handling the dough too much. This is why I usually make drop biscuits instead of rolling mine out. The longer the butter stays cold in the dough before you put it in the oven to bake, the flakier your biscuits will be. Too much handling means tough biscuits!
2 cups unbleached all-purpose flour
2 1/2 teaspoons baking powder
1/4 teaspoon baking soda
dash salt
1/4 cup butter or shortening
3/4 to 1 cup of kefir milk or buttermilk or regular milk
In a large bowl mix the dry ingredients together or sift them together. Cut butter into small chunks and incorporate into the dry ingredients with a pastry knife until the butter is smaller than a pea, but not as fine as cornmeal. Add your liquid and stir until the dough is still a little firm, but will drop from a Tablespoon.
Drop the dough by large Tablespoonfuls onto a greased cookie sheet and bake in a preheated 425 degree oven until browned to your liking. I bake mine 15-20 minutes, because I like mine crispy on the bottoms.
While the biscuits are baking, I make the sausage gravy~
Sausage Gravy
1 pound sausage ~ I use our M4-D Ranch Beef Sausage
2-3 Tablespoons flour
1-1 1/2 cups milk
salt to taste
pepper to taste
I brown my sausage in a large cast iron skillet until done. Remove sausage from the skillet and set aside. With our sausage, it cooks very lean, so there is usually not a whole lot of grease left in the pan. But you need some grease to mix in with the sausage crumblings left in the skillet to make the roux for your gravy base. So, with our sausage, I usually have to add about a Tablespoon of bacon grease in order to have enough. You need about 1-2 Tablespoons of drippings from cooking the sausage to make a skillet full of gravy.
I add about 1 1/2 times the amount of flour to the pan that I have in drippings - I want a dryish "paste" to brown for my gravy base - this is called the roux. For the photos below, I added about 2-3 Tablespoons of flour. Just add your flour in a little at a time until and incorporate into the the drippings until you have a fairly thick consistency.
Brown the roux. The darker you brown your roux, the darker your gravy will be after you add your milk. I like my gravy pretty browned, so I cook it until the roux is very dark. There are no rules - just make it the color you want it and remember that when you add the milk it will lighten.
Once your roux is the desired color, add your milk all at one time. Whisk well to prevent lumps over medium heat. Continue to whisk and cook at boiling to allow the gravy to thicken. Cook until it is the thickness you desire, again there are no hard rules to follow. Make your gravy as thick as you want. If you added a little too much milk, it will thicken, but might take a little longer cooking time. Don't forget to add your salt and pepper to taste.
Once your gravy is the thickness you desire, add the sausage back in and heat it well.
Next, plate your biscuits, cut them open and spoon the gravy over the top - YUM!
When I was growing up, we'd have this kind of "milk gravy" just about any time my mom made a meal with fried meat ~ fried chicken, fried pork chops, country fried steak - it was good! The steps are always the same - cook your meat, leave some drippings, add flour and brown to make a roux, stir in your milk and heat until thick. A southern staple!
Here are the steps in photos - first for the biscuits, then for the gravy: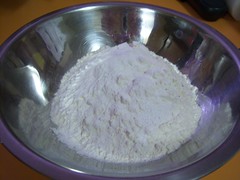
Dry ingredients for the biscuits
Butter and pastry knife
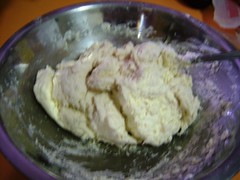
Notice the dough has some "stickiness" too it. Not firm enough to roll out, but not thin enough to run off the spoon.
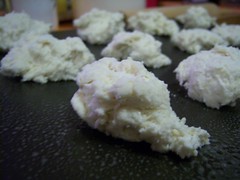
Biscuits going into the oven
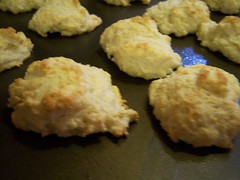
Biscuits out of the oven

Beef sausage in cast iron pan

Sausage as it is browning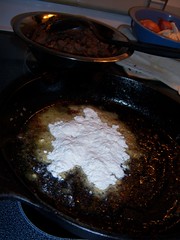
Flour added to drippings to form the roux.
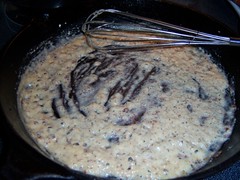
Roux is browning over medium heat.

Milk added to the browned roux.
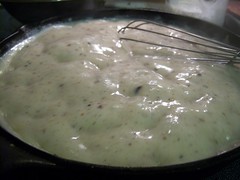
Bringing the mixture to a full boil to thicken.
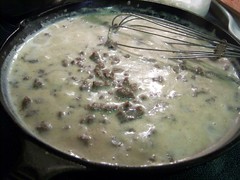
When thick, the sausage is added back in and heated.
Easy and Tasty Beef Lasagna
For quite awhile, I've avoided making lasagna even though I love it, because most recipes call for cheese and sausage ingredients that I just don't usually have on hand.
So, this weekend I had some time one night and decided to browse lasagna recipes again. I found a few that were made with very simple ingredients and decided to alter them using what ingredients I already had on hand in my pantry or refrigerator.
Now, if you are a believer that lasagna just isn't "real" unless it has ricotta cheese and italian sausage and other exotic ingredients, then you might want to pass this recipe on by. But, if you like lasagna and are looking for a quick and easy recipe that is very tasty, you might want to give this one a try.
It whips together very quickly and can be baked right away, can be put in the refrigerator to bake later or even frozen. And it makes a large lasagna pan FULL. If you have a small family, you'll probably want to cut this recipe in half or plan to freeze half for another meal.
Ready?
Here we go.
~~~~Easy and Tasty Lasagna~~~~
~~For the Beef Sauce Layer~~
1.5 pounds of ground beef
1 pound of sausage
2 cloves of garlic, diced
2 large cans whole tomatoes or diced tomatoes
2 small cans tomato paste
2 Tablespoons Italian Seasoning
1 teaspoon salt
I used our grass-fed ground beef and grass-fed beef sausage for this recipe. It cooks up nicely and is lean enough that I don't have to drain off any fat. I cooked both in a large skillet with the garlic until the beef and sausage was brown and crumbly. If you use conventional beef from the grocery, you'll need to drain off about half the fat when it is done.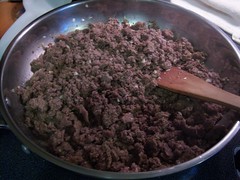
Next, add in two large cans of tomatoes. I used organic tuscan tomatoes shown in the picture below, because I've already used my supply of canned and frozen tomatoes from last year and it is what I had on hand. So, use whole tomatoes, diced tomatoes, stewed tomatoes, whatever you have on hand.
Next add in 2 cans of tomato paste, the salt and the italian seasoning.
Mix together well and allow to come to a boil in the skillet. Remove from heat and set aside.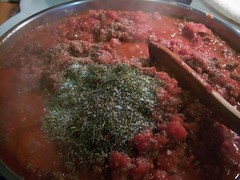
~~For the Cheese Sauce Layer~~
2 cups cottage cheese
1 cup kefir cheese
2 beaten eggs
1/2 cup shredded 4 cheese mexican blend
1 teaspoon italian seasoning
1 teaspoon salt
You could use 3 cups of cottage cheese, but I didn't have that much on hand and I always have kefir cheese that I've made in the fridge, so I made a substitution. Also, instead of the mexican shredded cheese blend, you could use 1/2 cup of parmesan cheese. We never buy the pre-shredded parmesan cheese, only the blocks of fresh parmesan and I wanted to save it for the topping.
In a large bowl combine the cottage cheese, kefir cheese, eggs, shredded cheese, italian seasoning and salt. Set aside.
~~Putting it all together~~
1 box of lasagna noodles
1 large lasagna pan
butter or no-stick spray
mozzarella cheese - whole slices or shredded and/or more of the shredded 4 cheese mexican blend.
Butter or spray the sides and bottom of a large lasagna pan. Place a solid layer of the lasagna noodles on the bottom. I didn't pre-cook mine and my recipe turned out just lovely. So don't worry, give it a try without cooking the noodles first.
Next, place a nice layer of the cheese sauce on top of the noodles. On top of the cheese sauce, add a nice layer of mozzarella cheese and/or the mexican cheese blend, whatever you have on hand. Top that with about 1/2 of the meat sauce mixture.
Add another layer of lasagna noodles, the rest of the cheese sauce, another layer of mozzarella or shredded cheese and the rest of the beef sauce. Top with a healthy layer of shredded mozzarella if you have it. I used shredded fresh parmesan cheese.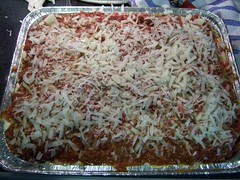
Now you are ready to bake it at 350 degrees for about 30 minutes, until it is bubbling and the cheese is nicely melted and browned on top.
I made mine early in the day and put it in the refrigerator until dinner time. I baked mine for about 45 minutes.
You could also freeze it for a later date.
I've tried to give detailed instructions here, but this is very easy to make and it went together for me really quickly, especially since I didn't pre-cook the lasagna noodles. So please don't be intimidated by the length of this post and think that it will take forever to put this together.
Let me know how this recipe works if you try it ~ especially if you alter it and can share a new way to make it that worked for you!
Enjoy!